My wife, who used to be a manager for MAC Cosmetics, was tasked with throwing special product launch parties for her employees. The events were themed, based on the latest MAC product collections that were released a few times each year. Best of all, the cost was covered by her employer (within reason) so we could be creative and experiment without worrying about cost.
For this particular event, the theme was centered around baking. She asked me to help her make some props and handouts for the event and, after some idea bouncing, we figured cupcakes would be the easiest option to make. I did some quick research online and found that people had used spray insulation foam to form various baked goods but I couldn’t find any specific detailed instructions. I decided to experiment a bit using ideas that I had found online.
I did some shopping and acquired a few cans of spray insulating expansion foam, some cupcake cups, a few small paint buckets, various shades of acrylic brown/tan paint, and some cheap items from Michael’s that I thought would be good to use as fake sprinkles (mini-beads, glitter, etc…). I also bought a few different types of drywall spackle that I thought might possibly work as frosting. I eventually found what worked best was premixed lightweight spackle compound. I mean REALLY lightweight so that the full tub almost feels empty. Everything else was too wet and would either prevent piping or would “melt” as soon as I piped it out.

Once the supplies were assembled, we began construction. I first tested a few different ways of making the foam cupcakes. Putting the cupcake trays in a cupcake pan was the obvious first choice, however, as the foam expanded and cured, it would lift the cupcake cups out of the pan and expand into round balls.
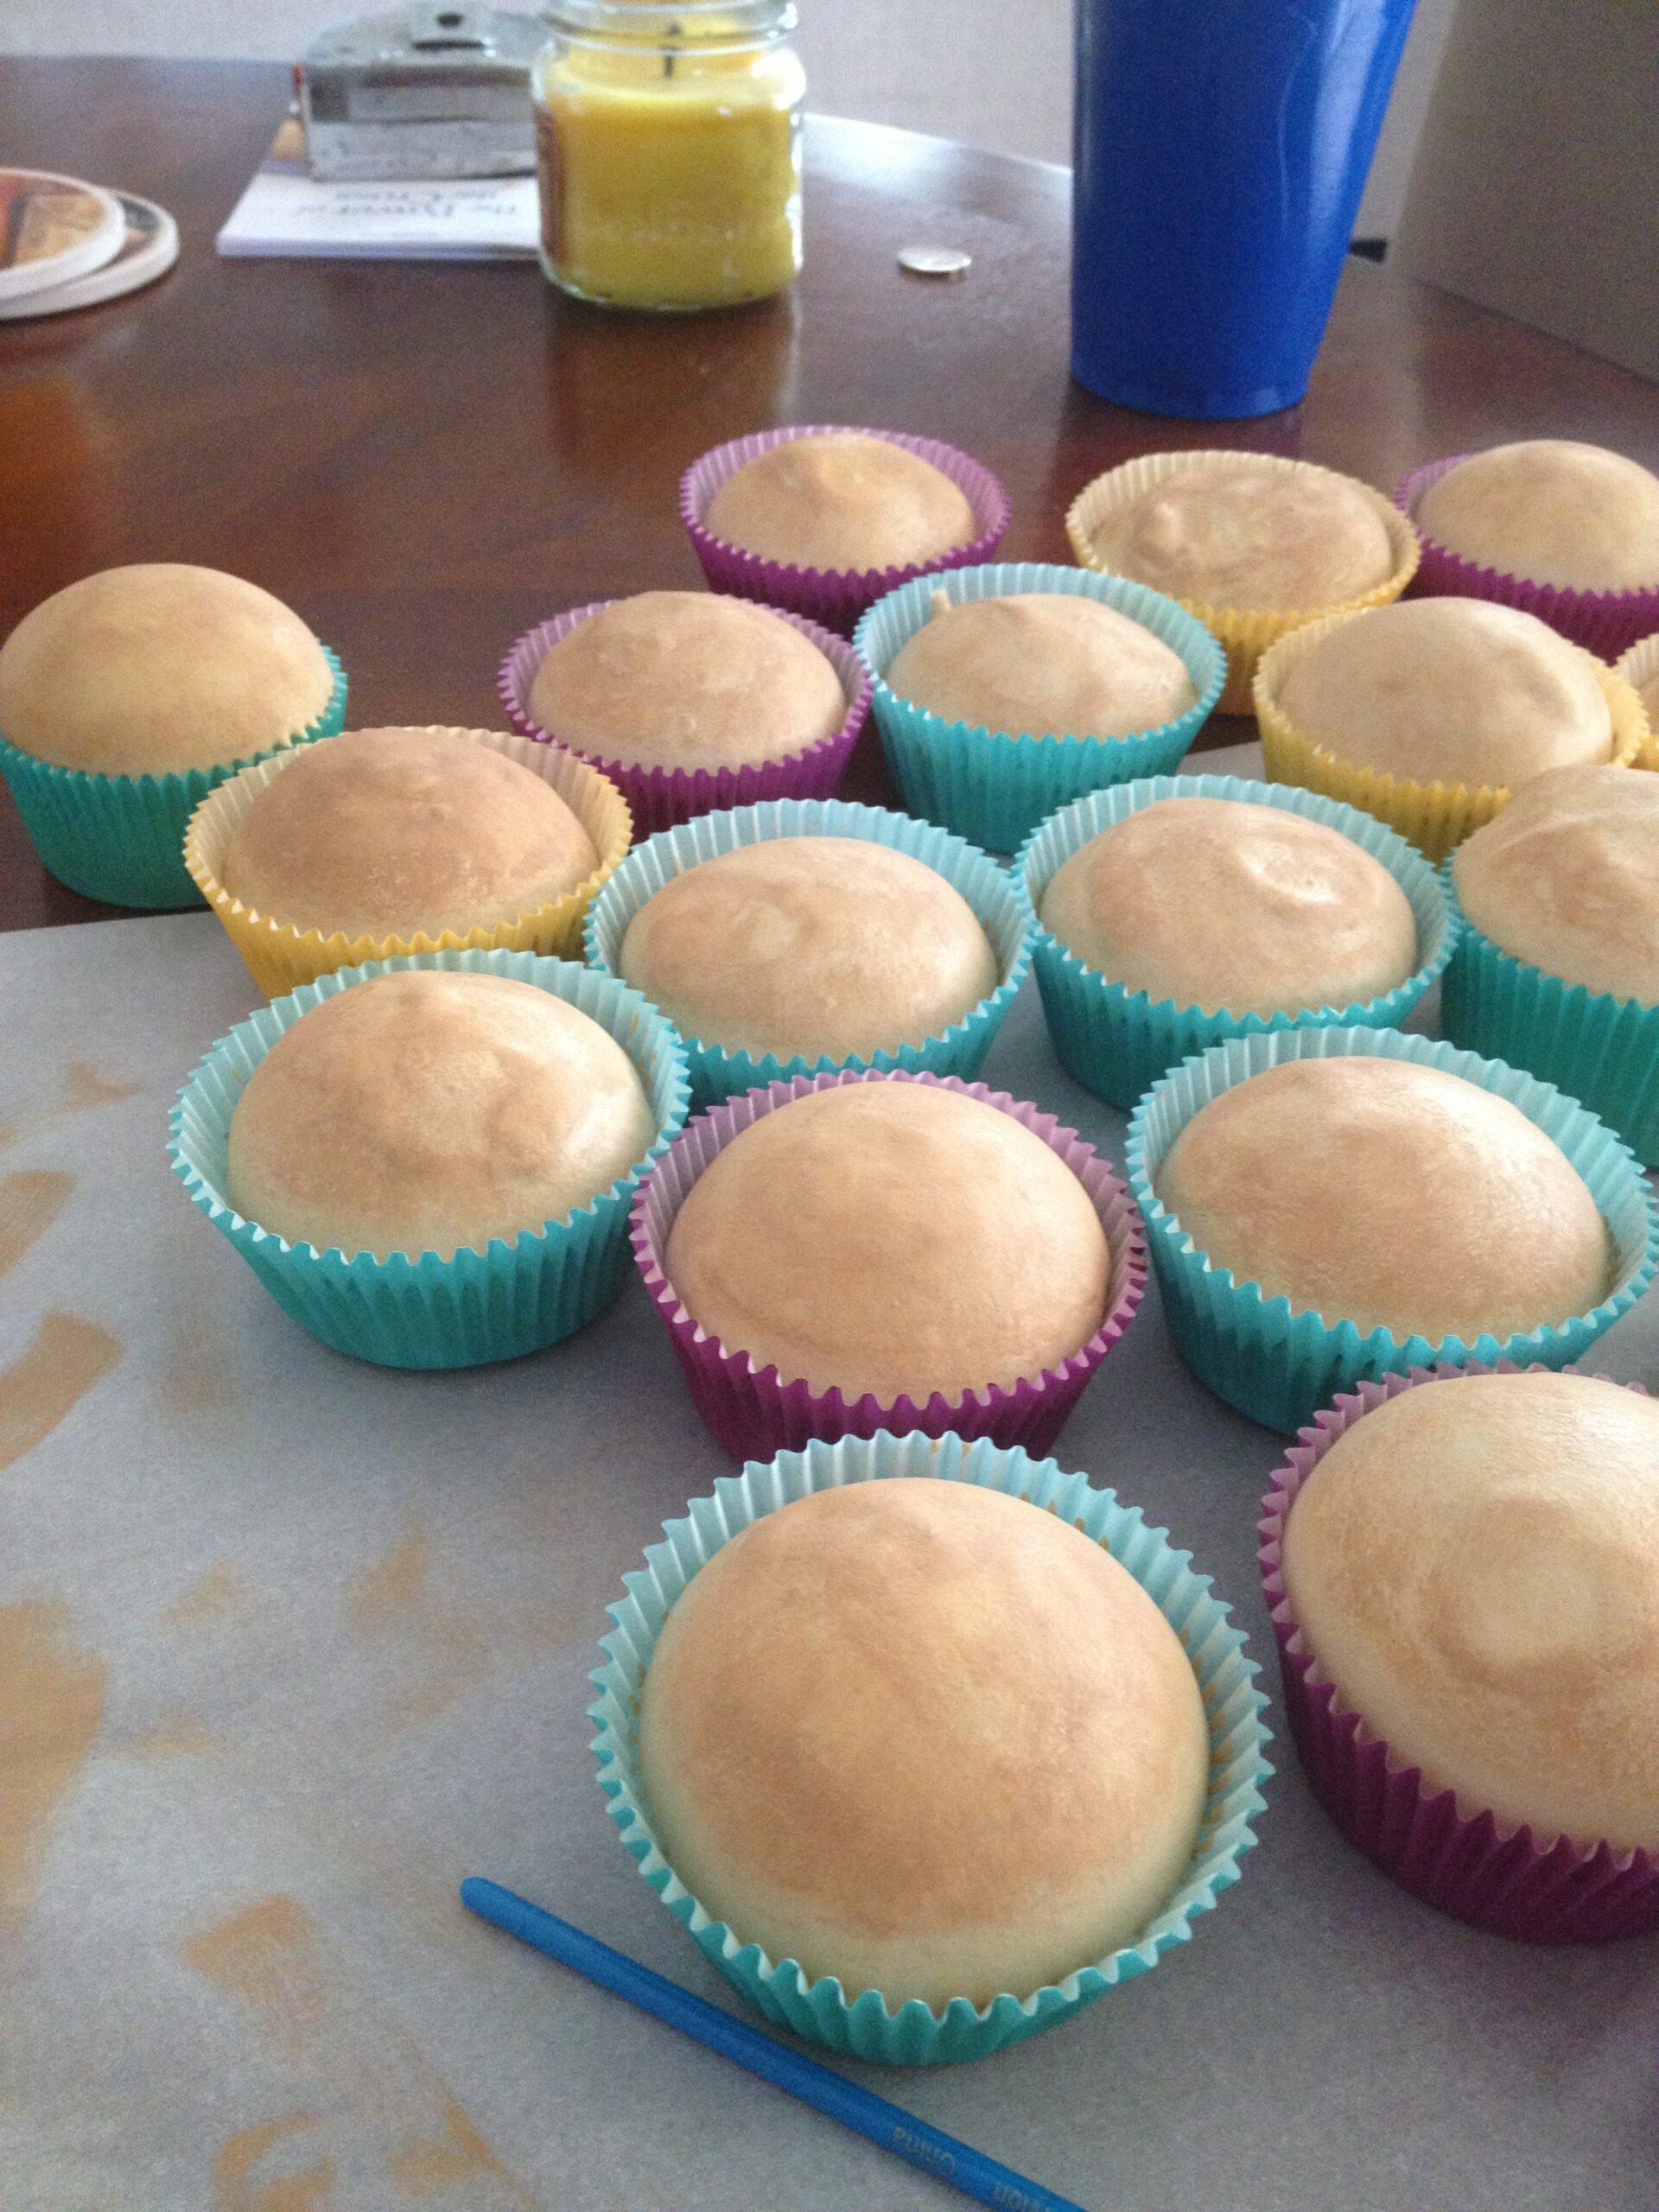
After more experimenting, I found placing a weight (large washer(s) or other weighty metal item) in the bottom of the cupcake cup prior to filling just under halfway with the spray foam, provided almost perfect cupcakes after curing for 24hrs. The weight held the cupcakes down in the cupcake pan so they didn’t lift out from the force of the foam’s expansion pressing sideways.
To create the gigantic cupcakes, we filled 2qt and 5qt paint buckets half way with the spray foam. The foam will permanently bond with the bucket, so I lined the buckets with wax paper, some of which stuck to foam but I knew would be covered by the cupcake cups, so I didn’t worry. Since there are obviously no cupcake cups large enough, We utilized cardstock to custom fold the large cups to fit around the large cupcakes and then lightly coated the cups with spraypaint inside and out to add color. I first cut out a large circle that would be large enough to wrap up the sides of the cupcake. I then accordion folded around the edge and used the original foam bucket to use as a creasing template to fold the paper up to the correct shape. It took a few tries to get the look I wanted.
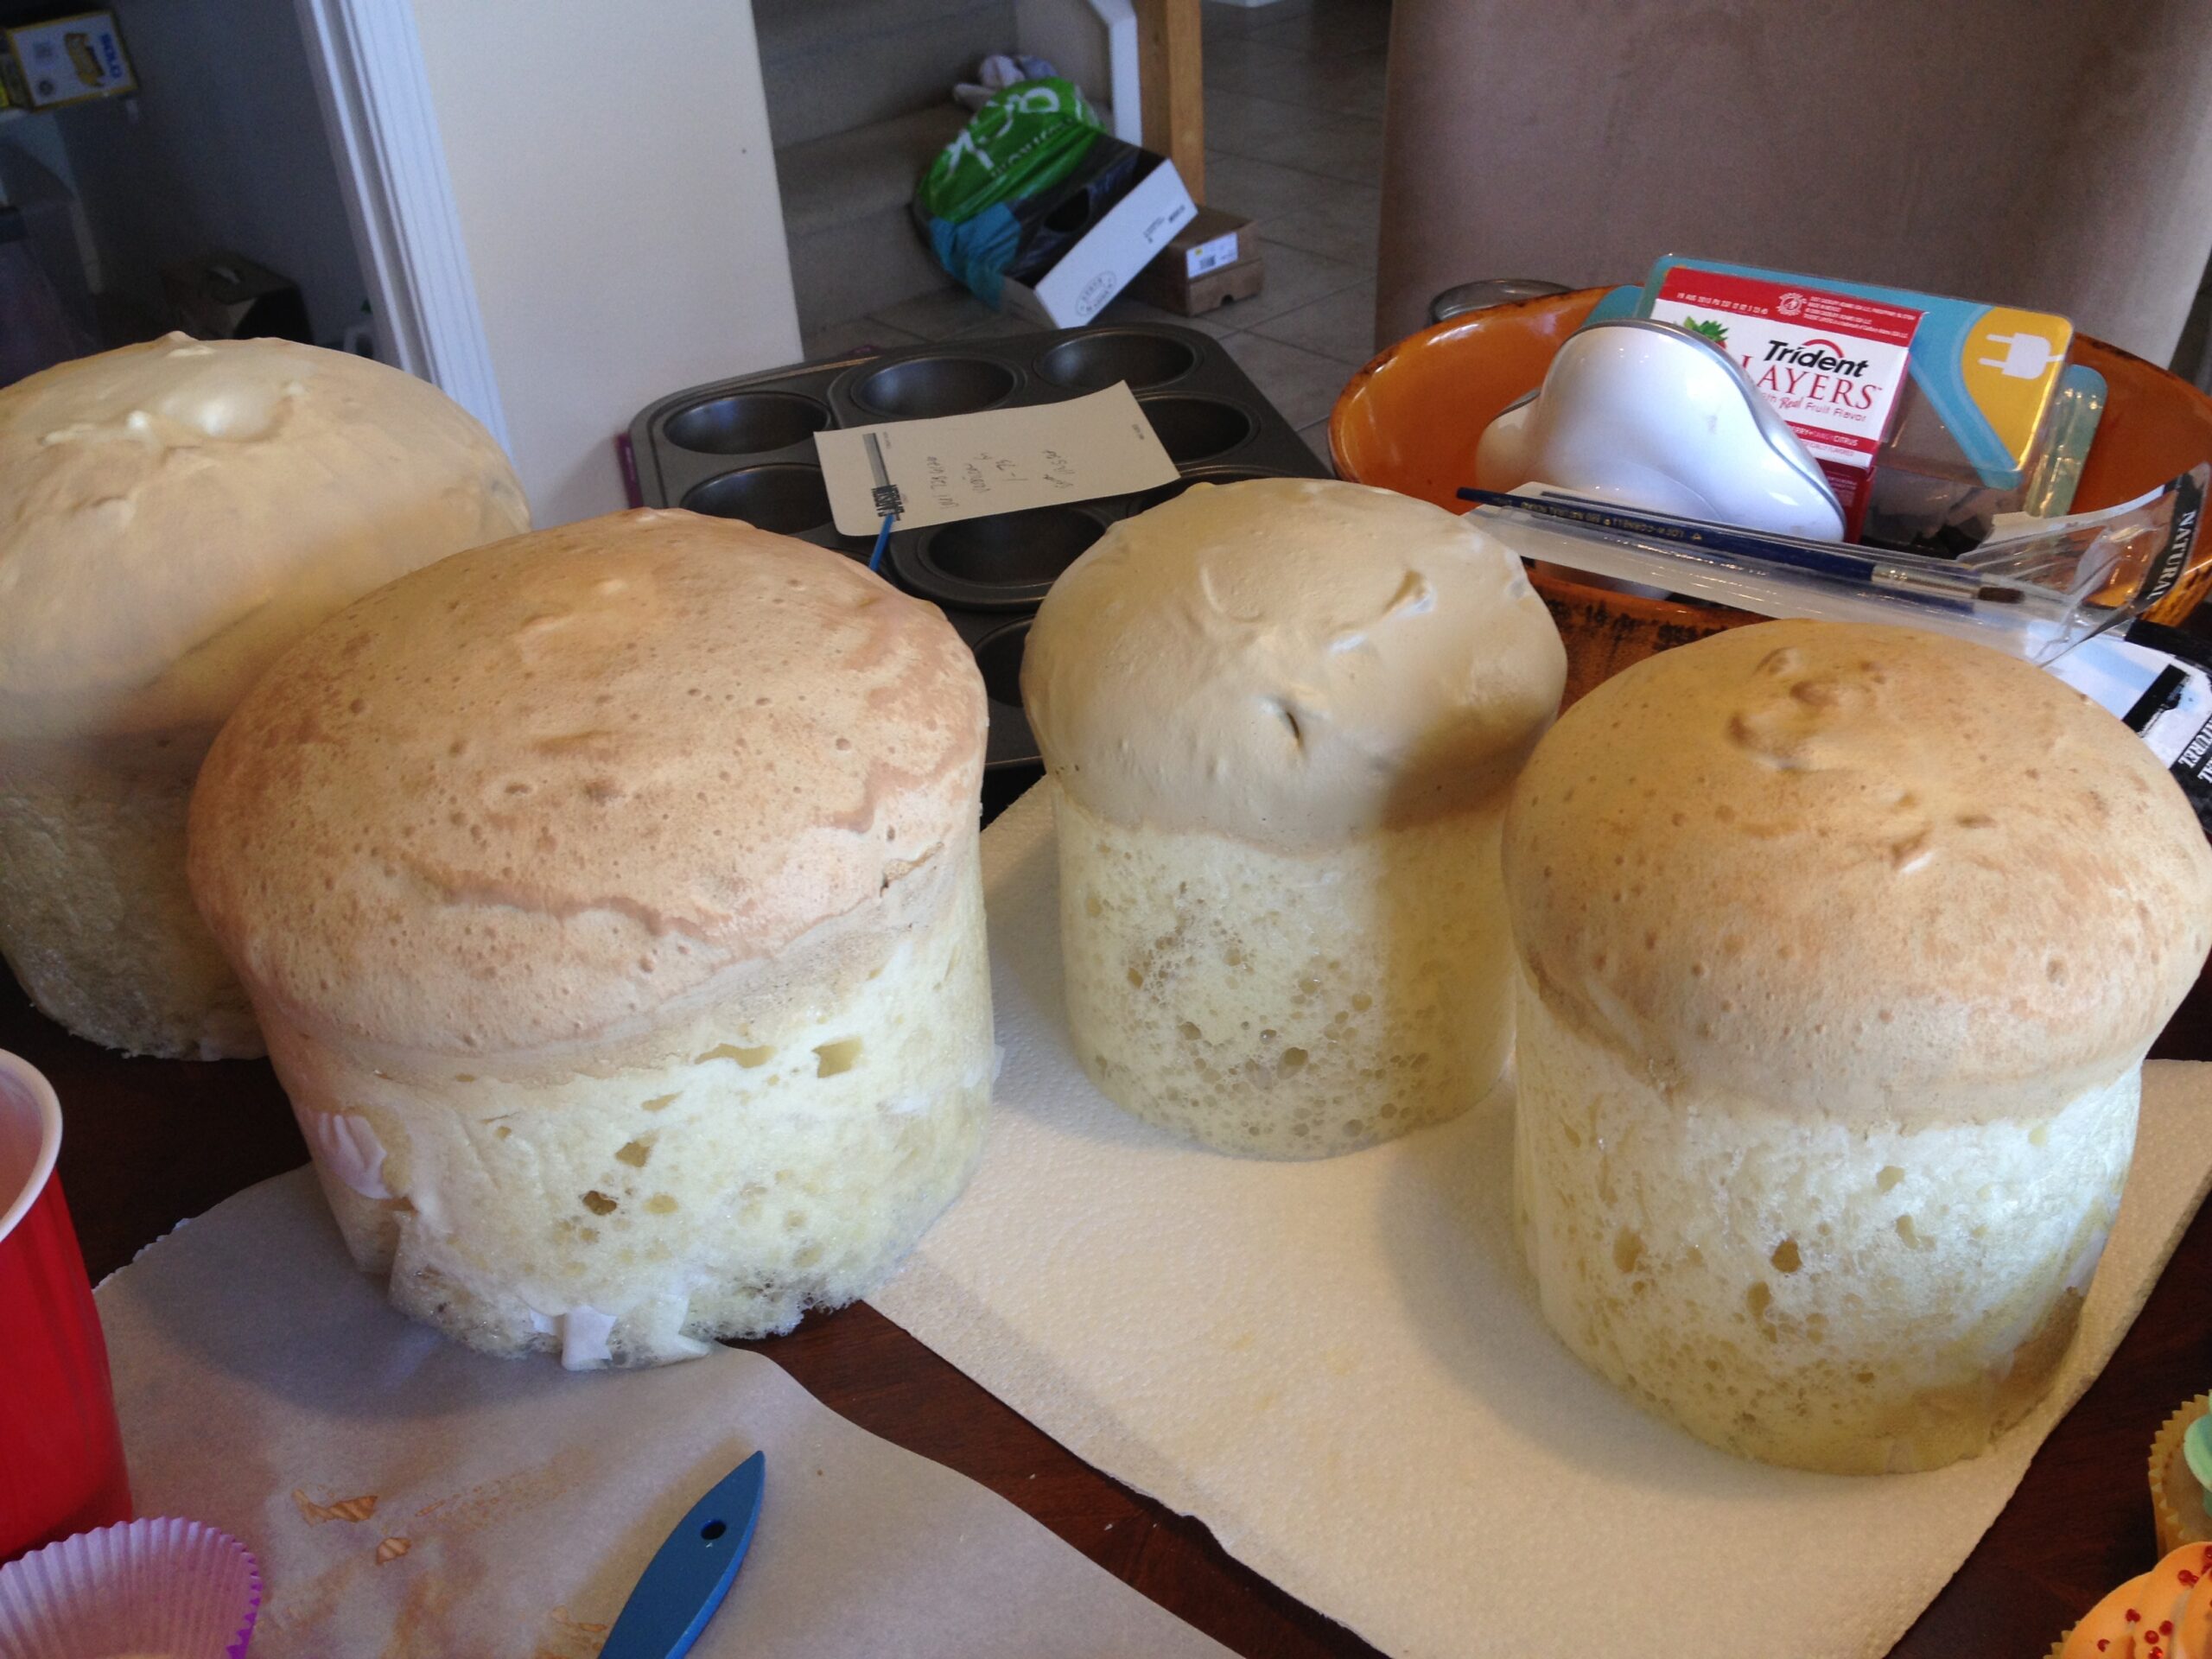
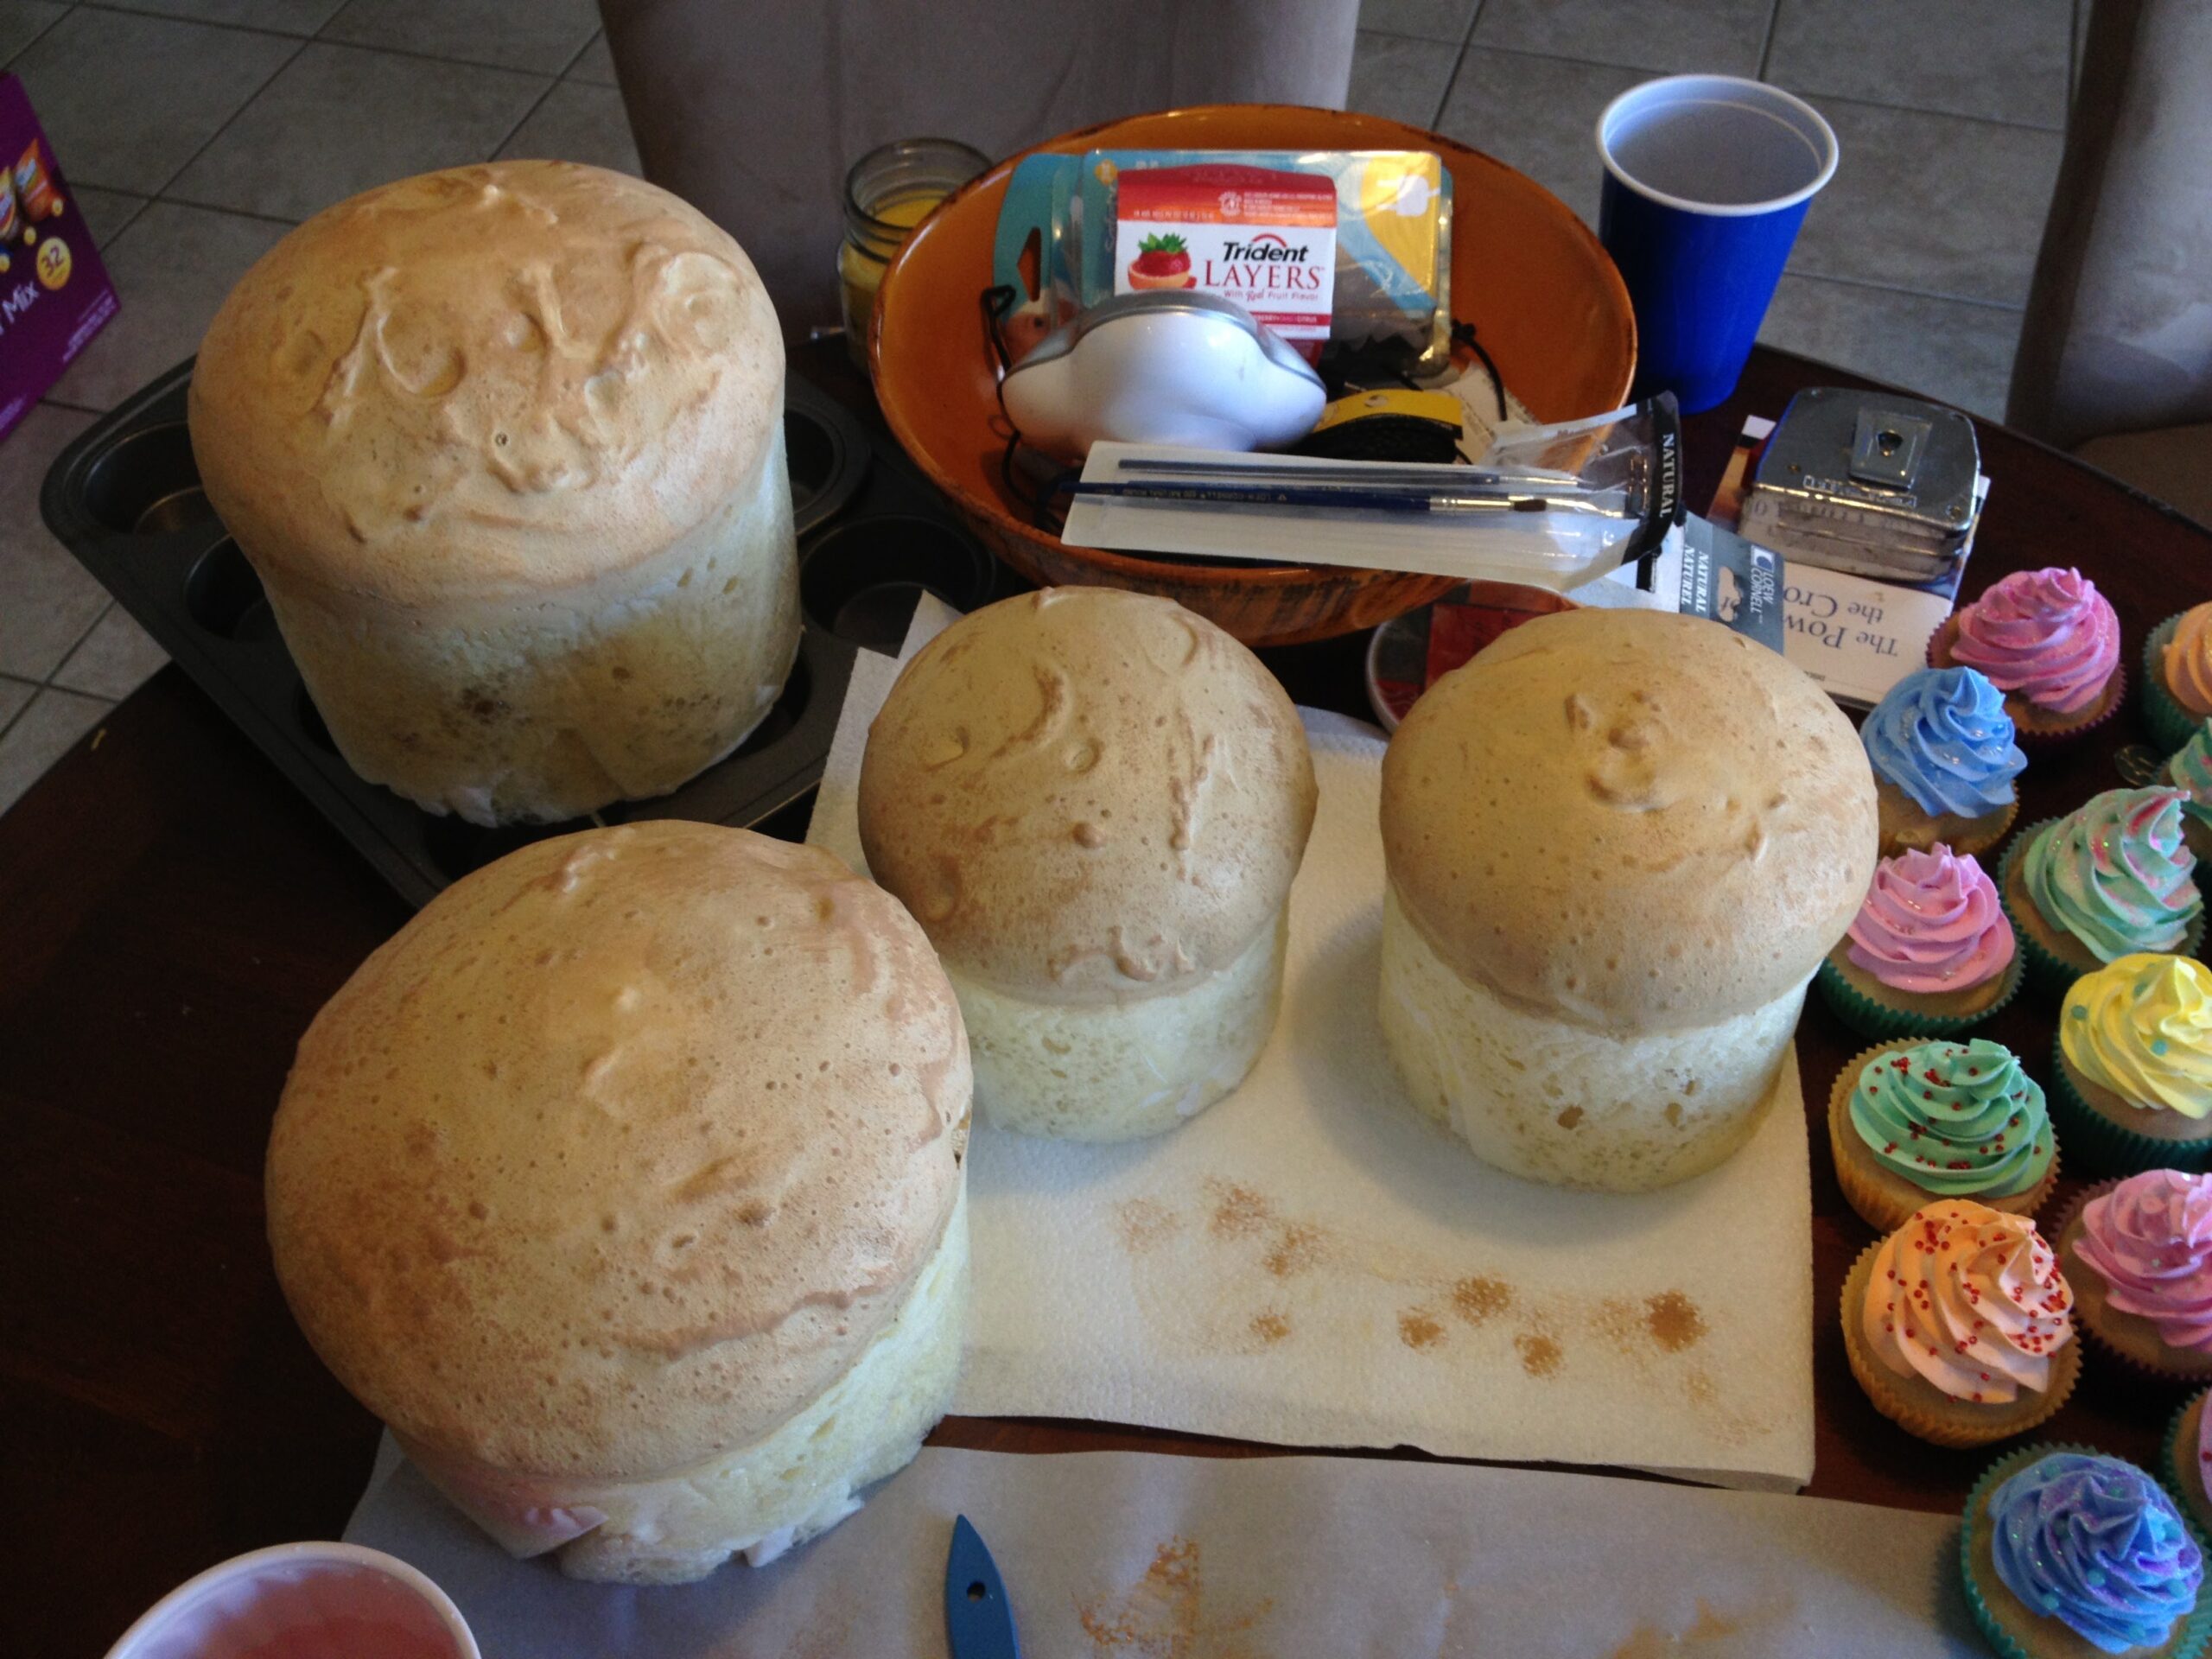

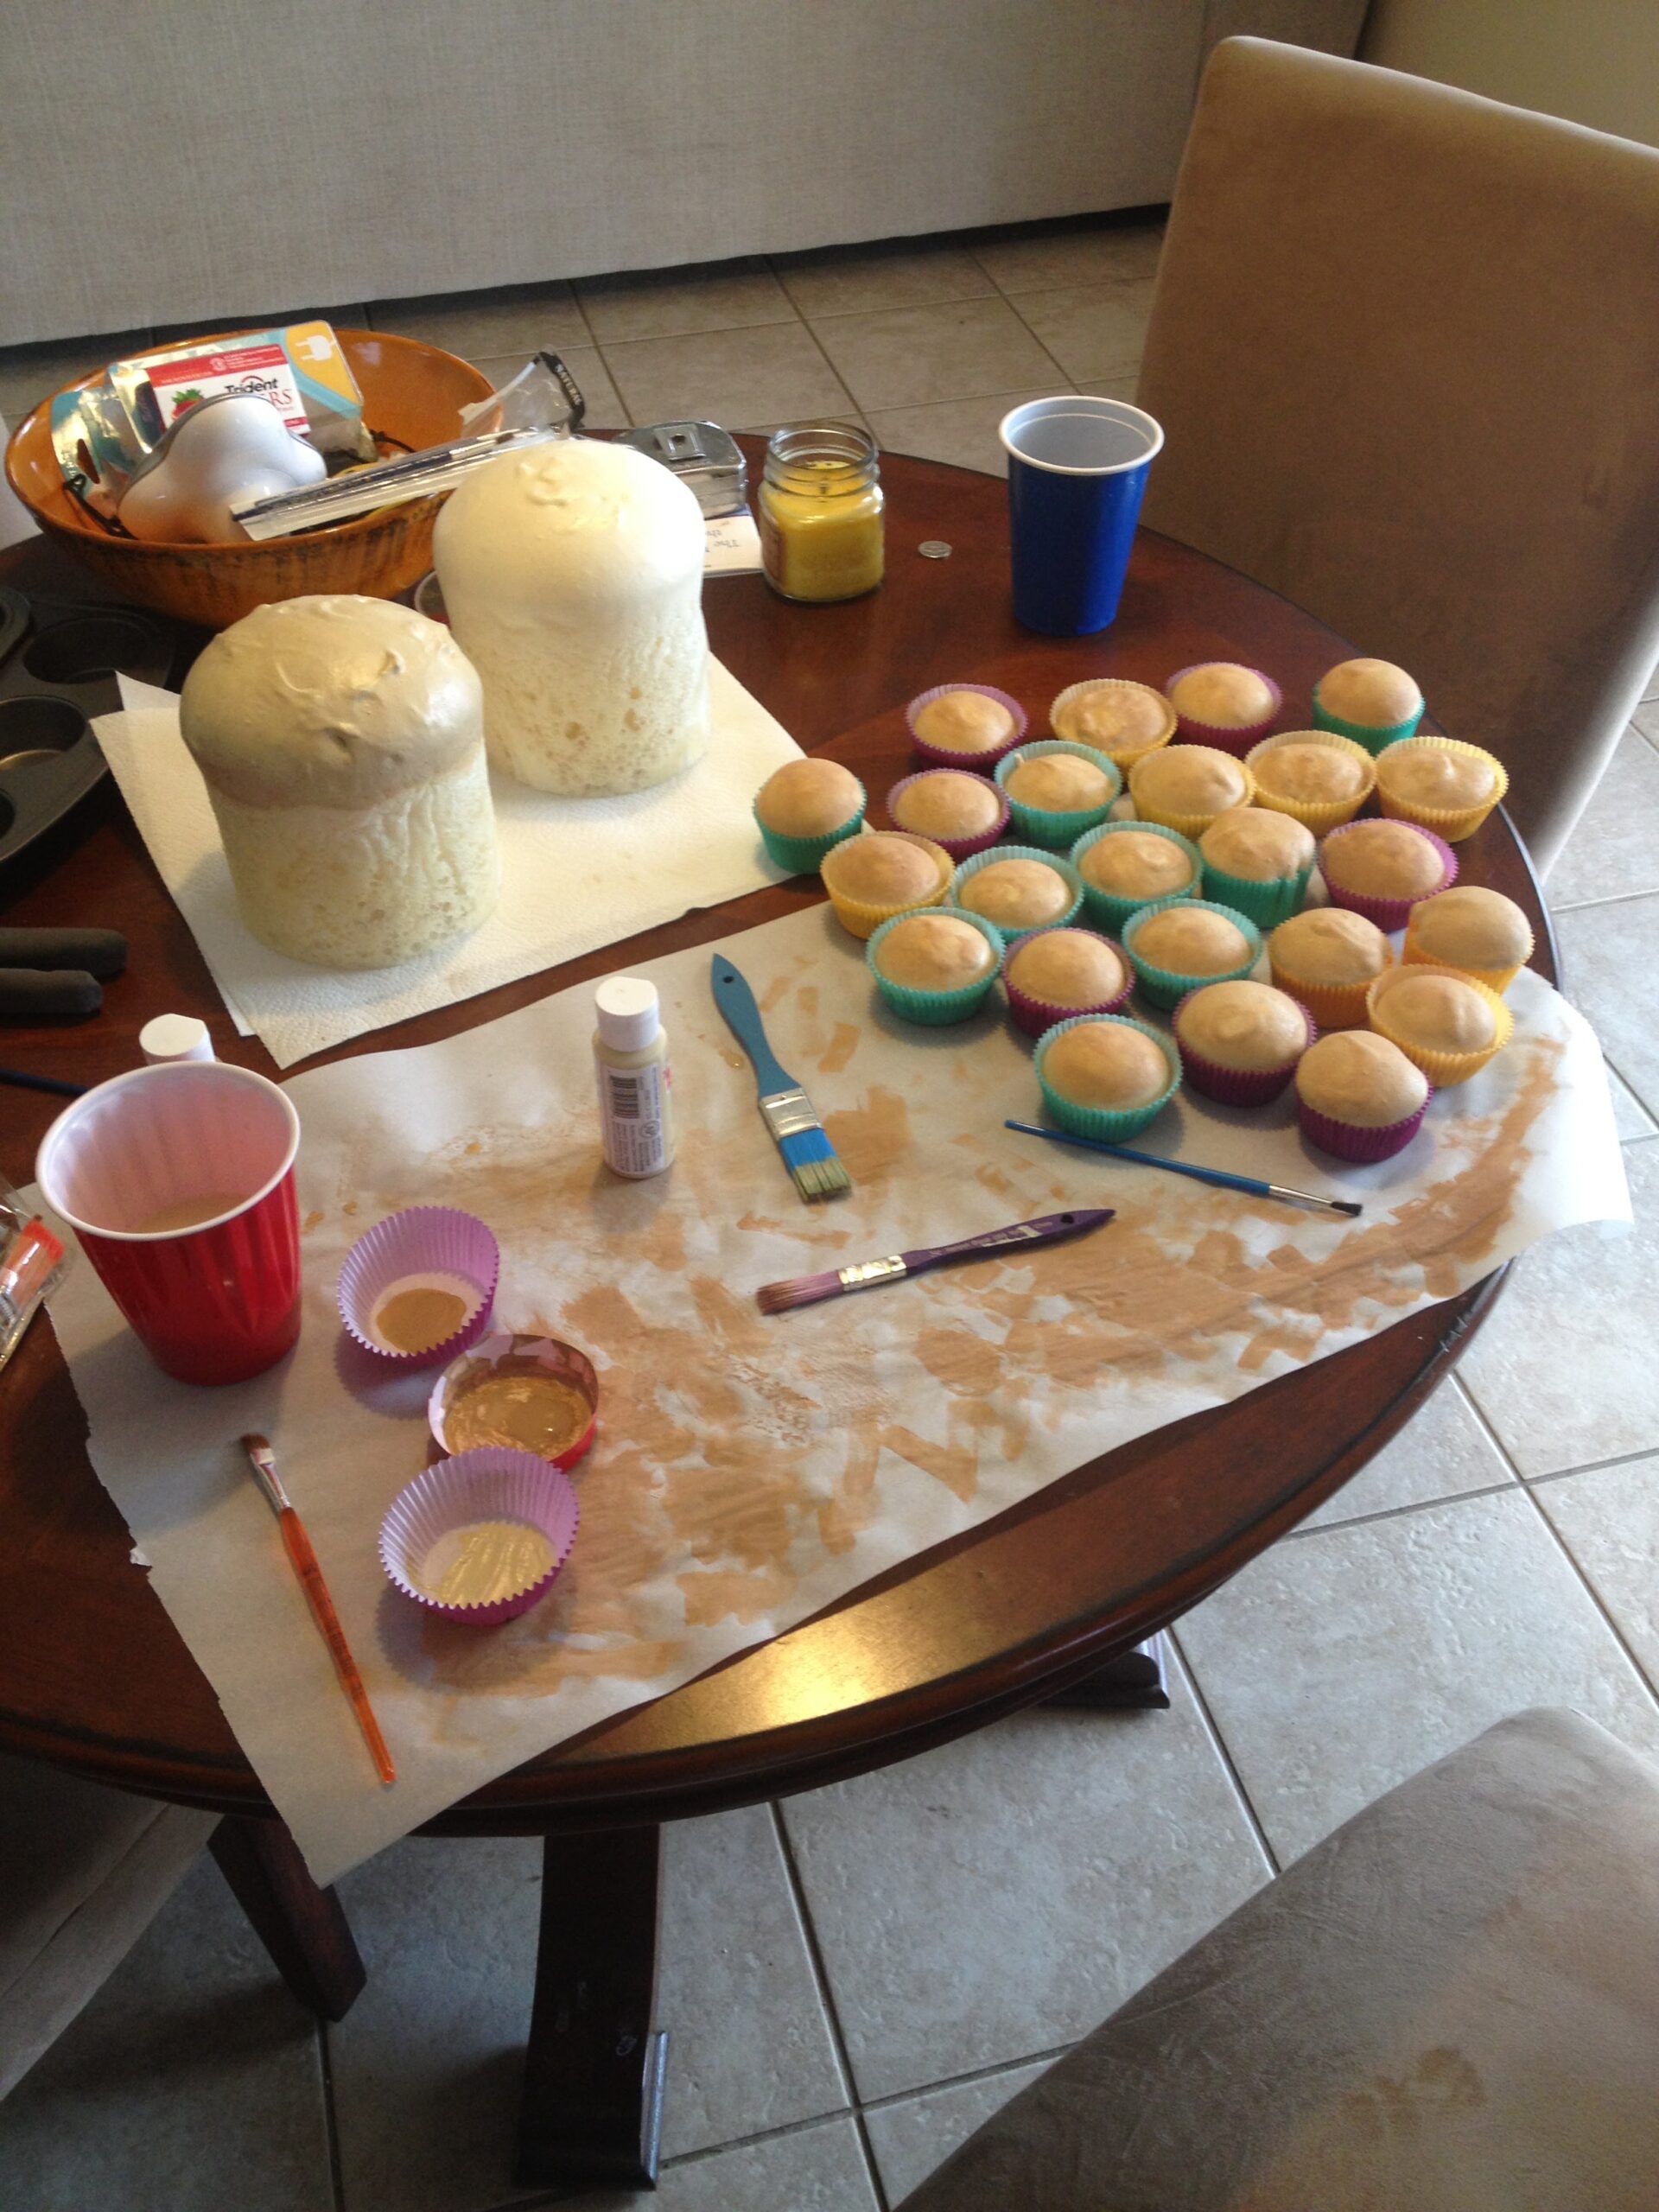
After all the foam had cured for all sizes, We began painting them to look like real cake instead of the yellow foam. I first coated the visible tops with a light tan and then used a dry brush technique with slightly darker brown to lightly brush the tops. The dark color attached to the raised areas giving the look of “browned” cake batter.

For the large cupcakes, I ran a heavy bead of hot glue all the way around the foam about halfway up and then pressed the custom paper cups into the glue. You can use string or something similar to tie around the cups, holding them to the foam until hot glue cools.
Now came the fun part of “Frosting” the cupcakes. Here we just did what any baker does and used a piping bag with a star tip to pipe the drywall spackle on the cupcakes. For the larger cupcakes, I had to create a custom large piping tip out of sheet metal so that the frosting looked proportionate. I also added blobs of extra spray foam to the tops of the large cupcakes to take up space and help hold up the piped spackle.
I mixed portions of the spackle with various tiny amounts of acrylic paint to tint the frosting into various shades. Food coloring drops worked as well. We found the drier the spackle, the better it piped and held shape while drying. Avoid mixing the spackle in original manufacturer containers as water settles to the bottom as it sits on the store shelf. The drier top 2/3 of the containers were found to be the perfect consistency. If the spackle is too wet, it will settle on the cupcake and look like the frosting is melting.


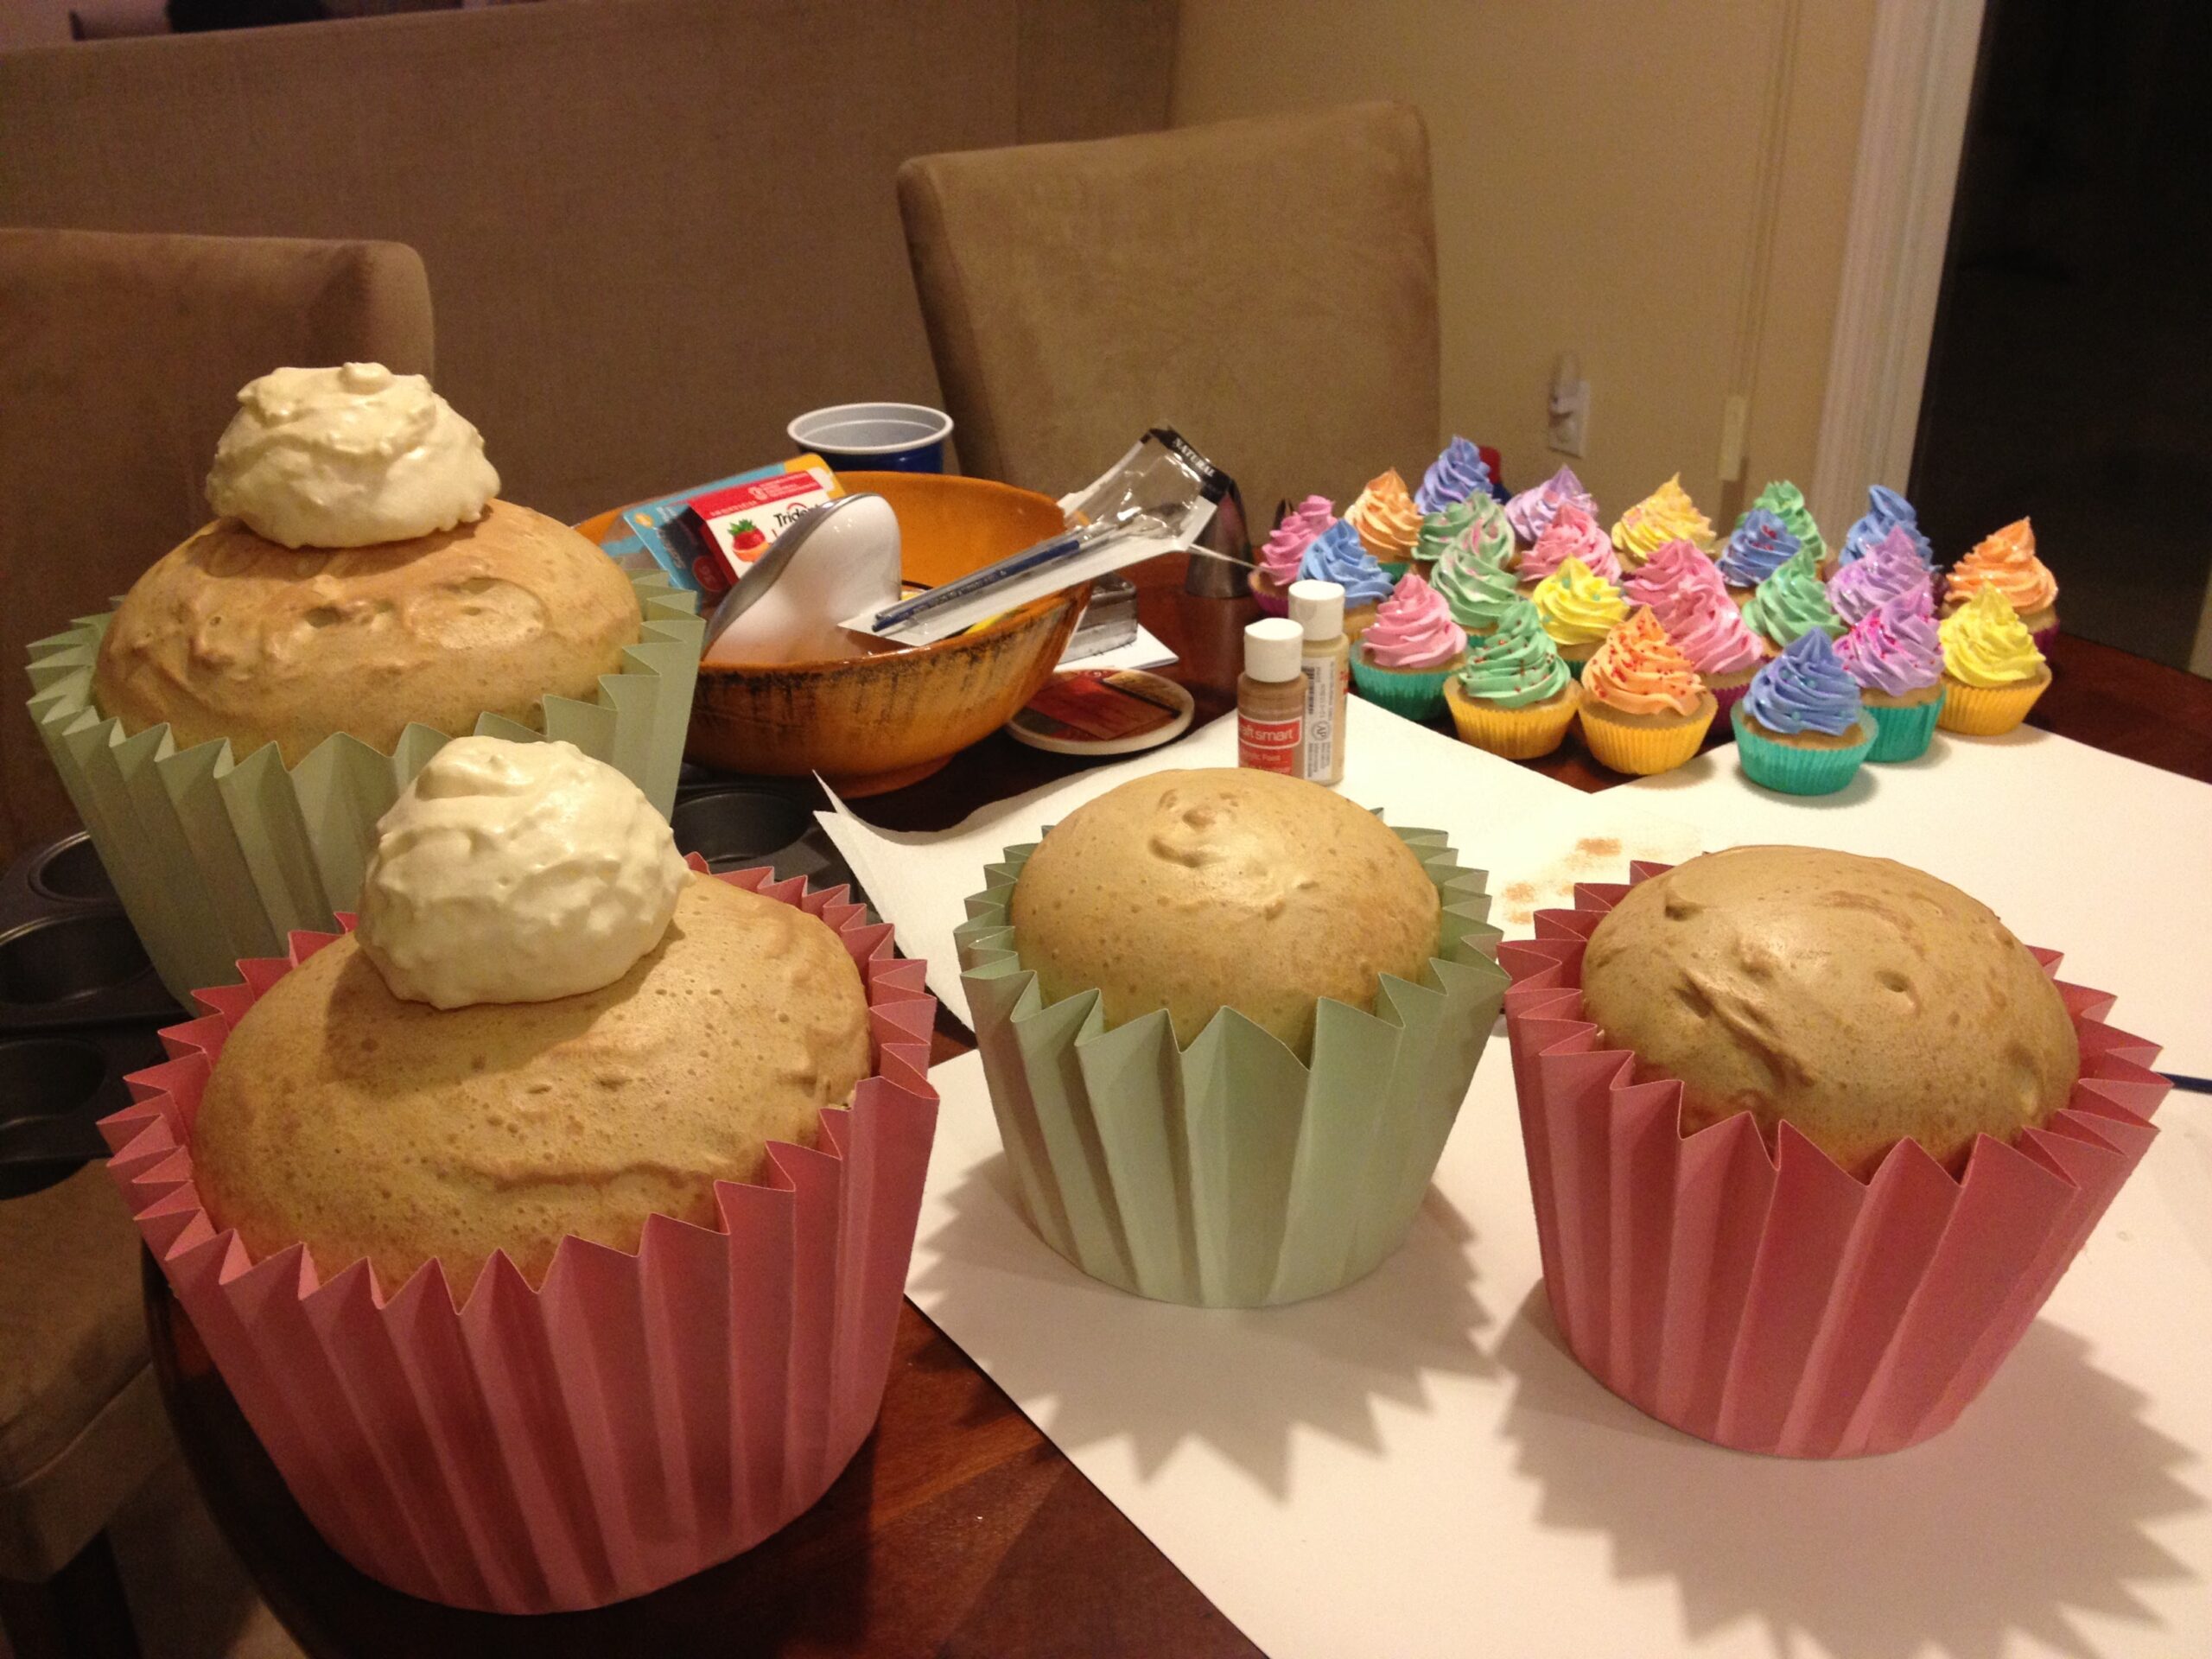
While the spackle was still wet on the cupcakes, we sprinkled various glitter and mini beads to create the look of sprinkles. After the spackle hardened, the beads were held in place and the finished product looked just like REAL cupcakes!

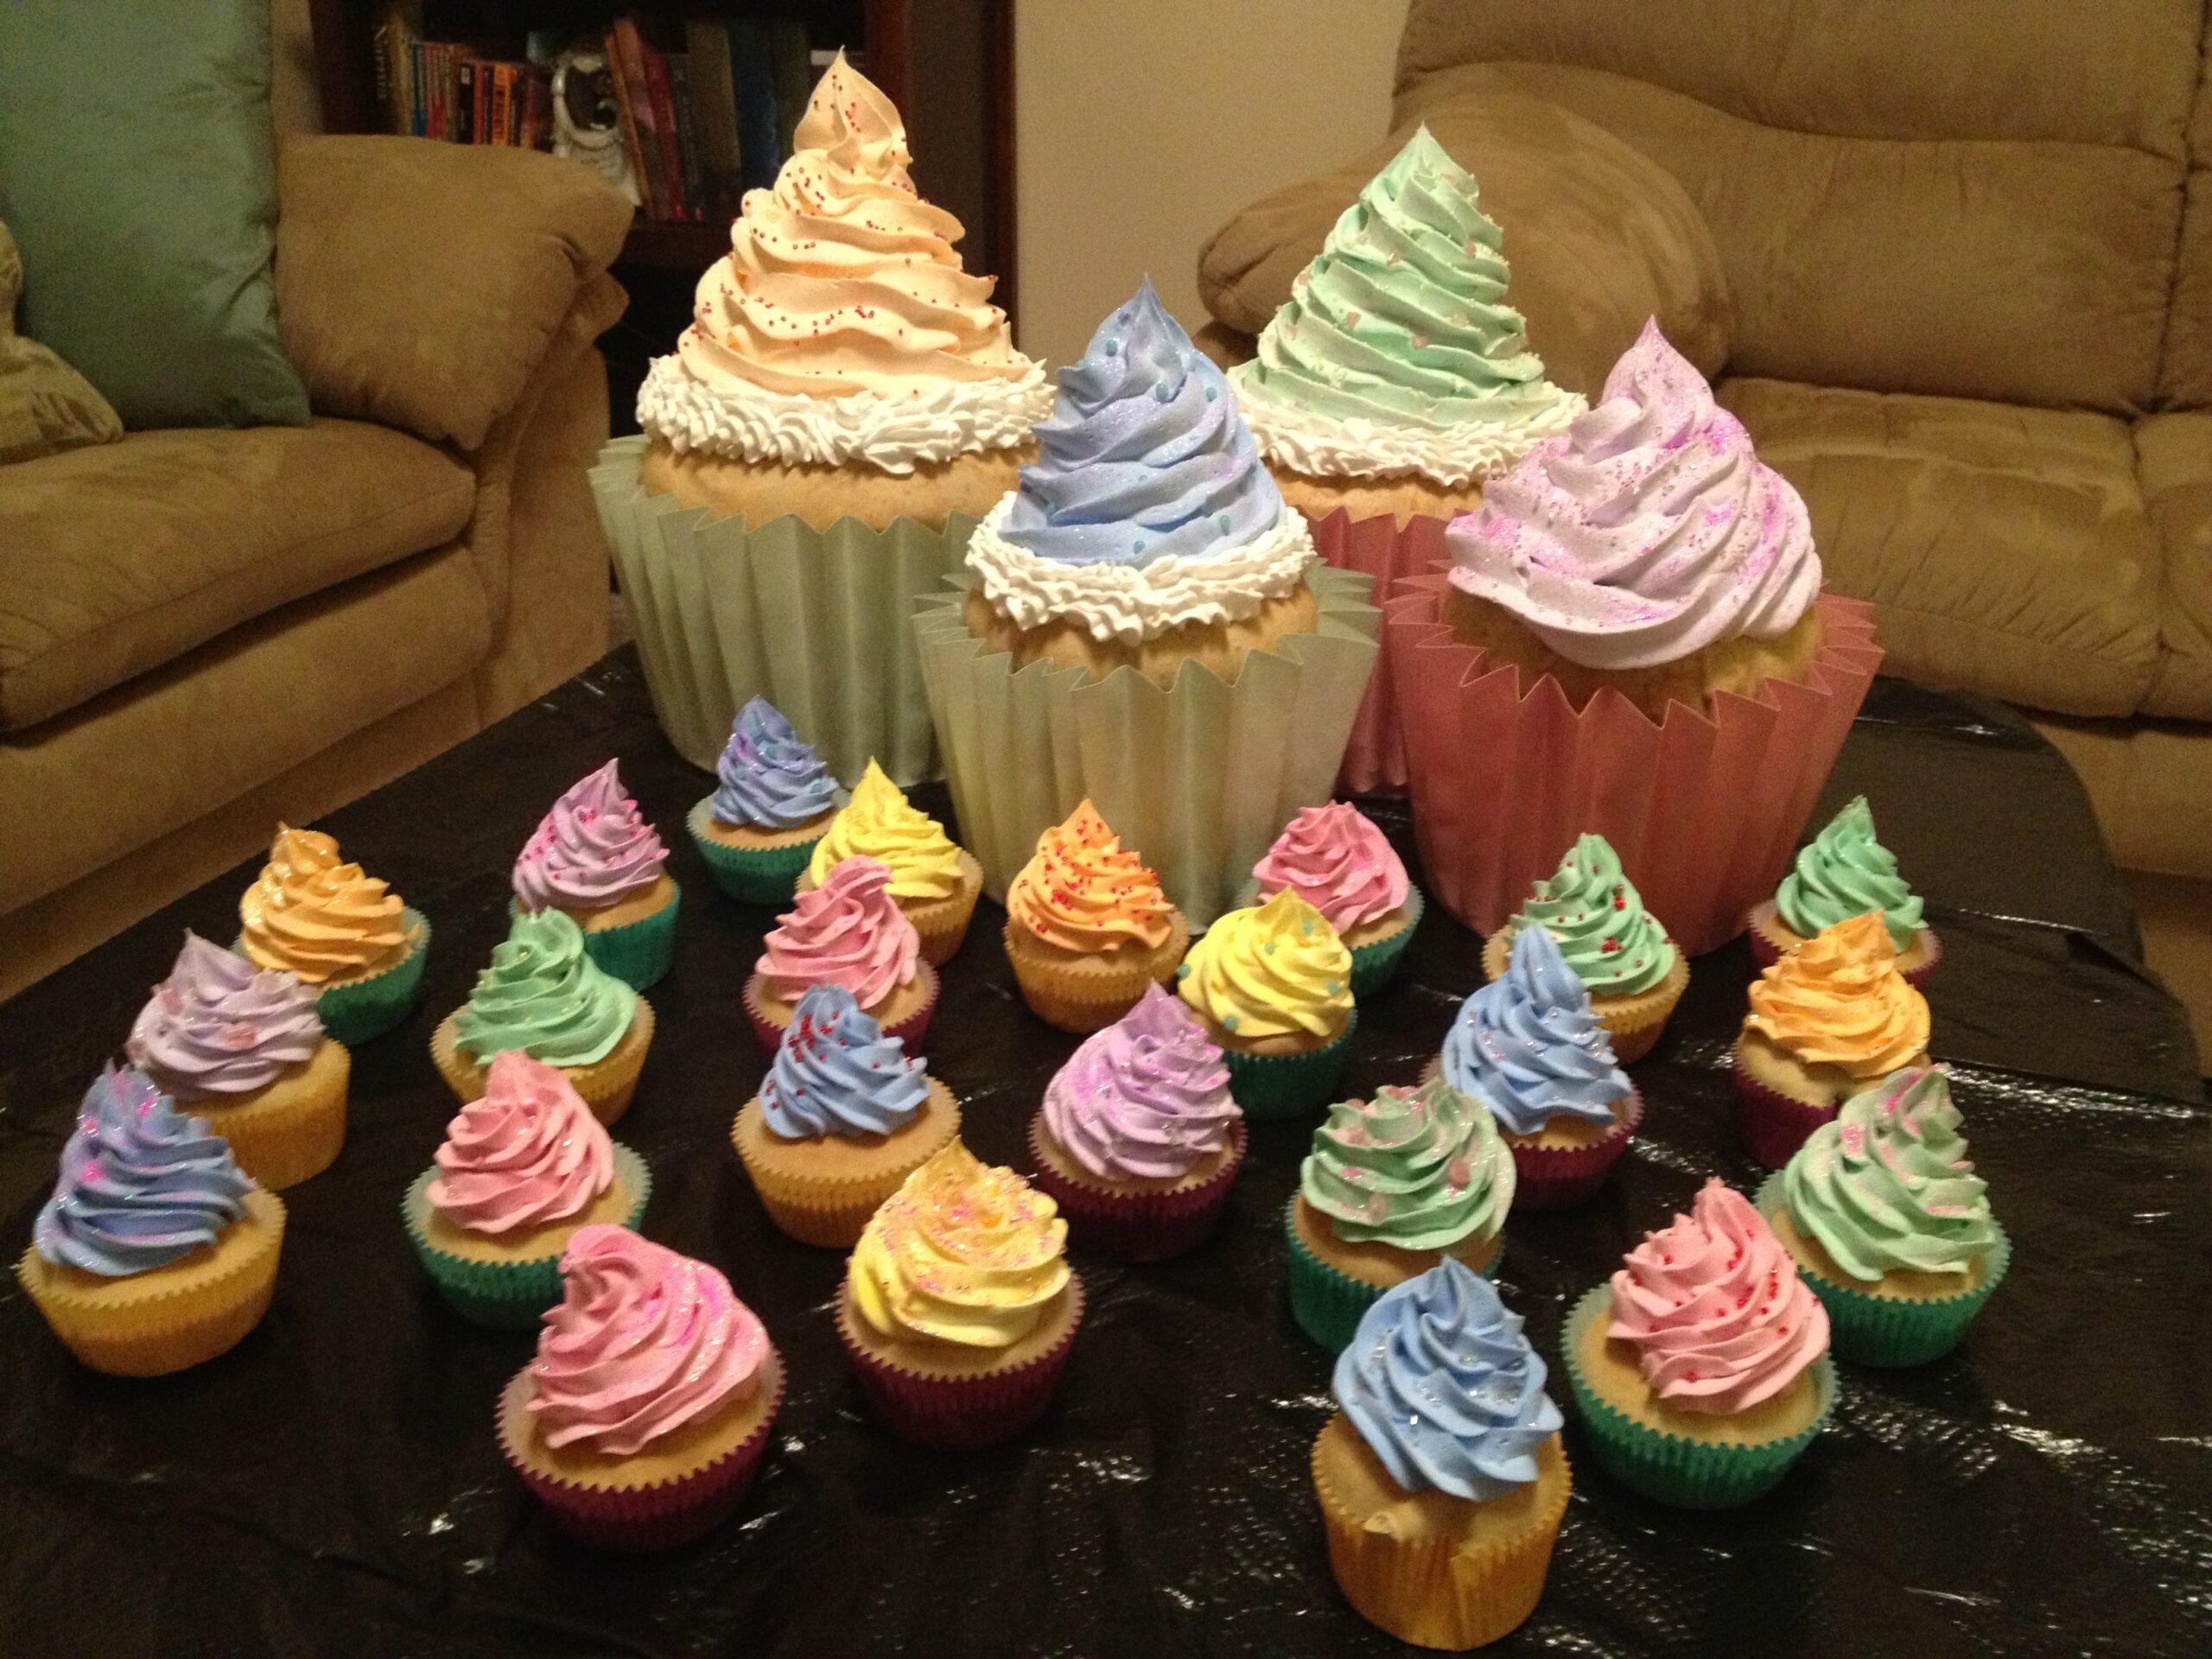


My wife’s MAC event was a huge hit and all her employees begged to take the fake cupcakes home, so she gave them out as gifts. I still have one small cupcake left on my den shelf to show of our work.
I am blown away! Of all the faux cupcakes I’ve searched for, these are the most realistic, gorgeous, amazing ones I’ve ever seen. I can’t get to the hardware store fast enough! Gotta find that extra lightweight spackle. thanks so much for sharing!
May I ask how durable you would say the faux buttercream was? Like is it possible for it to be part of a hair accessory? Thank you! I’m super stoked about this DIY, if it seems like it could work out, it may be exactly what I’m looking for! 🙂
Hello!
It would depend how much movement it would receive. The lightweight spackle dries like a piece of chalk. It’s fairly sturdy but could break if bent. Also, similar to chalk, it would start dissolving if exposed to water.
We gave away all but one of the cupcakes at the event they were created for. I still have the one remaining cupcake on a shelf in my office and it looks just like the day I made it, now almost 10 years later.
Hope that helps!