Growing up, some of my favorite memories are of watching and later helping my dad in his garage to build various woodworking projects. He didn’t have what some may call a “professional” garage with ducted dust collection and every power tool in existence, but he did have all the basic tools needed to bring various projects to life (rocking horses, bookcases, desks, etc…). In fact all of my baby toys were hand-made by my dad which included wooden cars and wooden animals to name a few. The memory filled scents of sawdust, hot wood from the belt sander, and wood glue, will forever be with me.
Now that I’m older and on my own, I long to follow in his footsteps and utilize the skills he instilled into me to build various wood projects of my own. As part of this process, and limited by the cost of mass purchasing all the needed tools directly, I set out to build my own version of a tablesaw. With my dad’s help during a visit, we constructed a multi-function table.

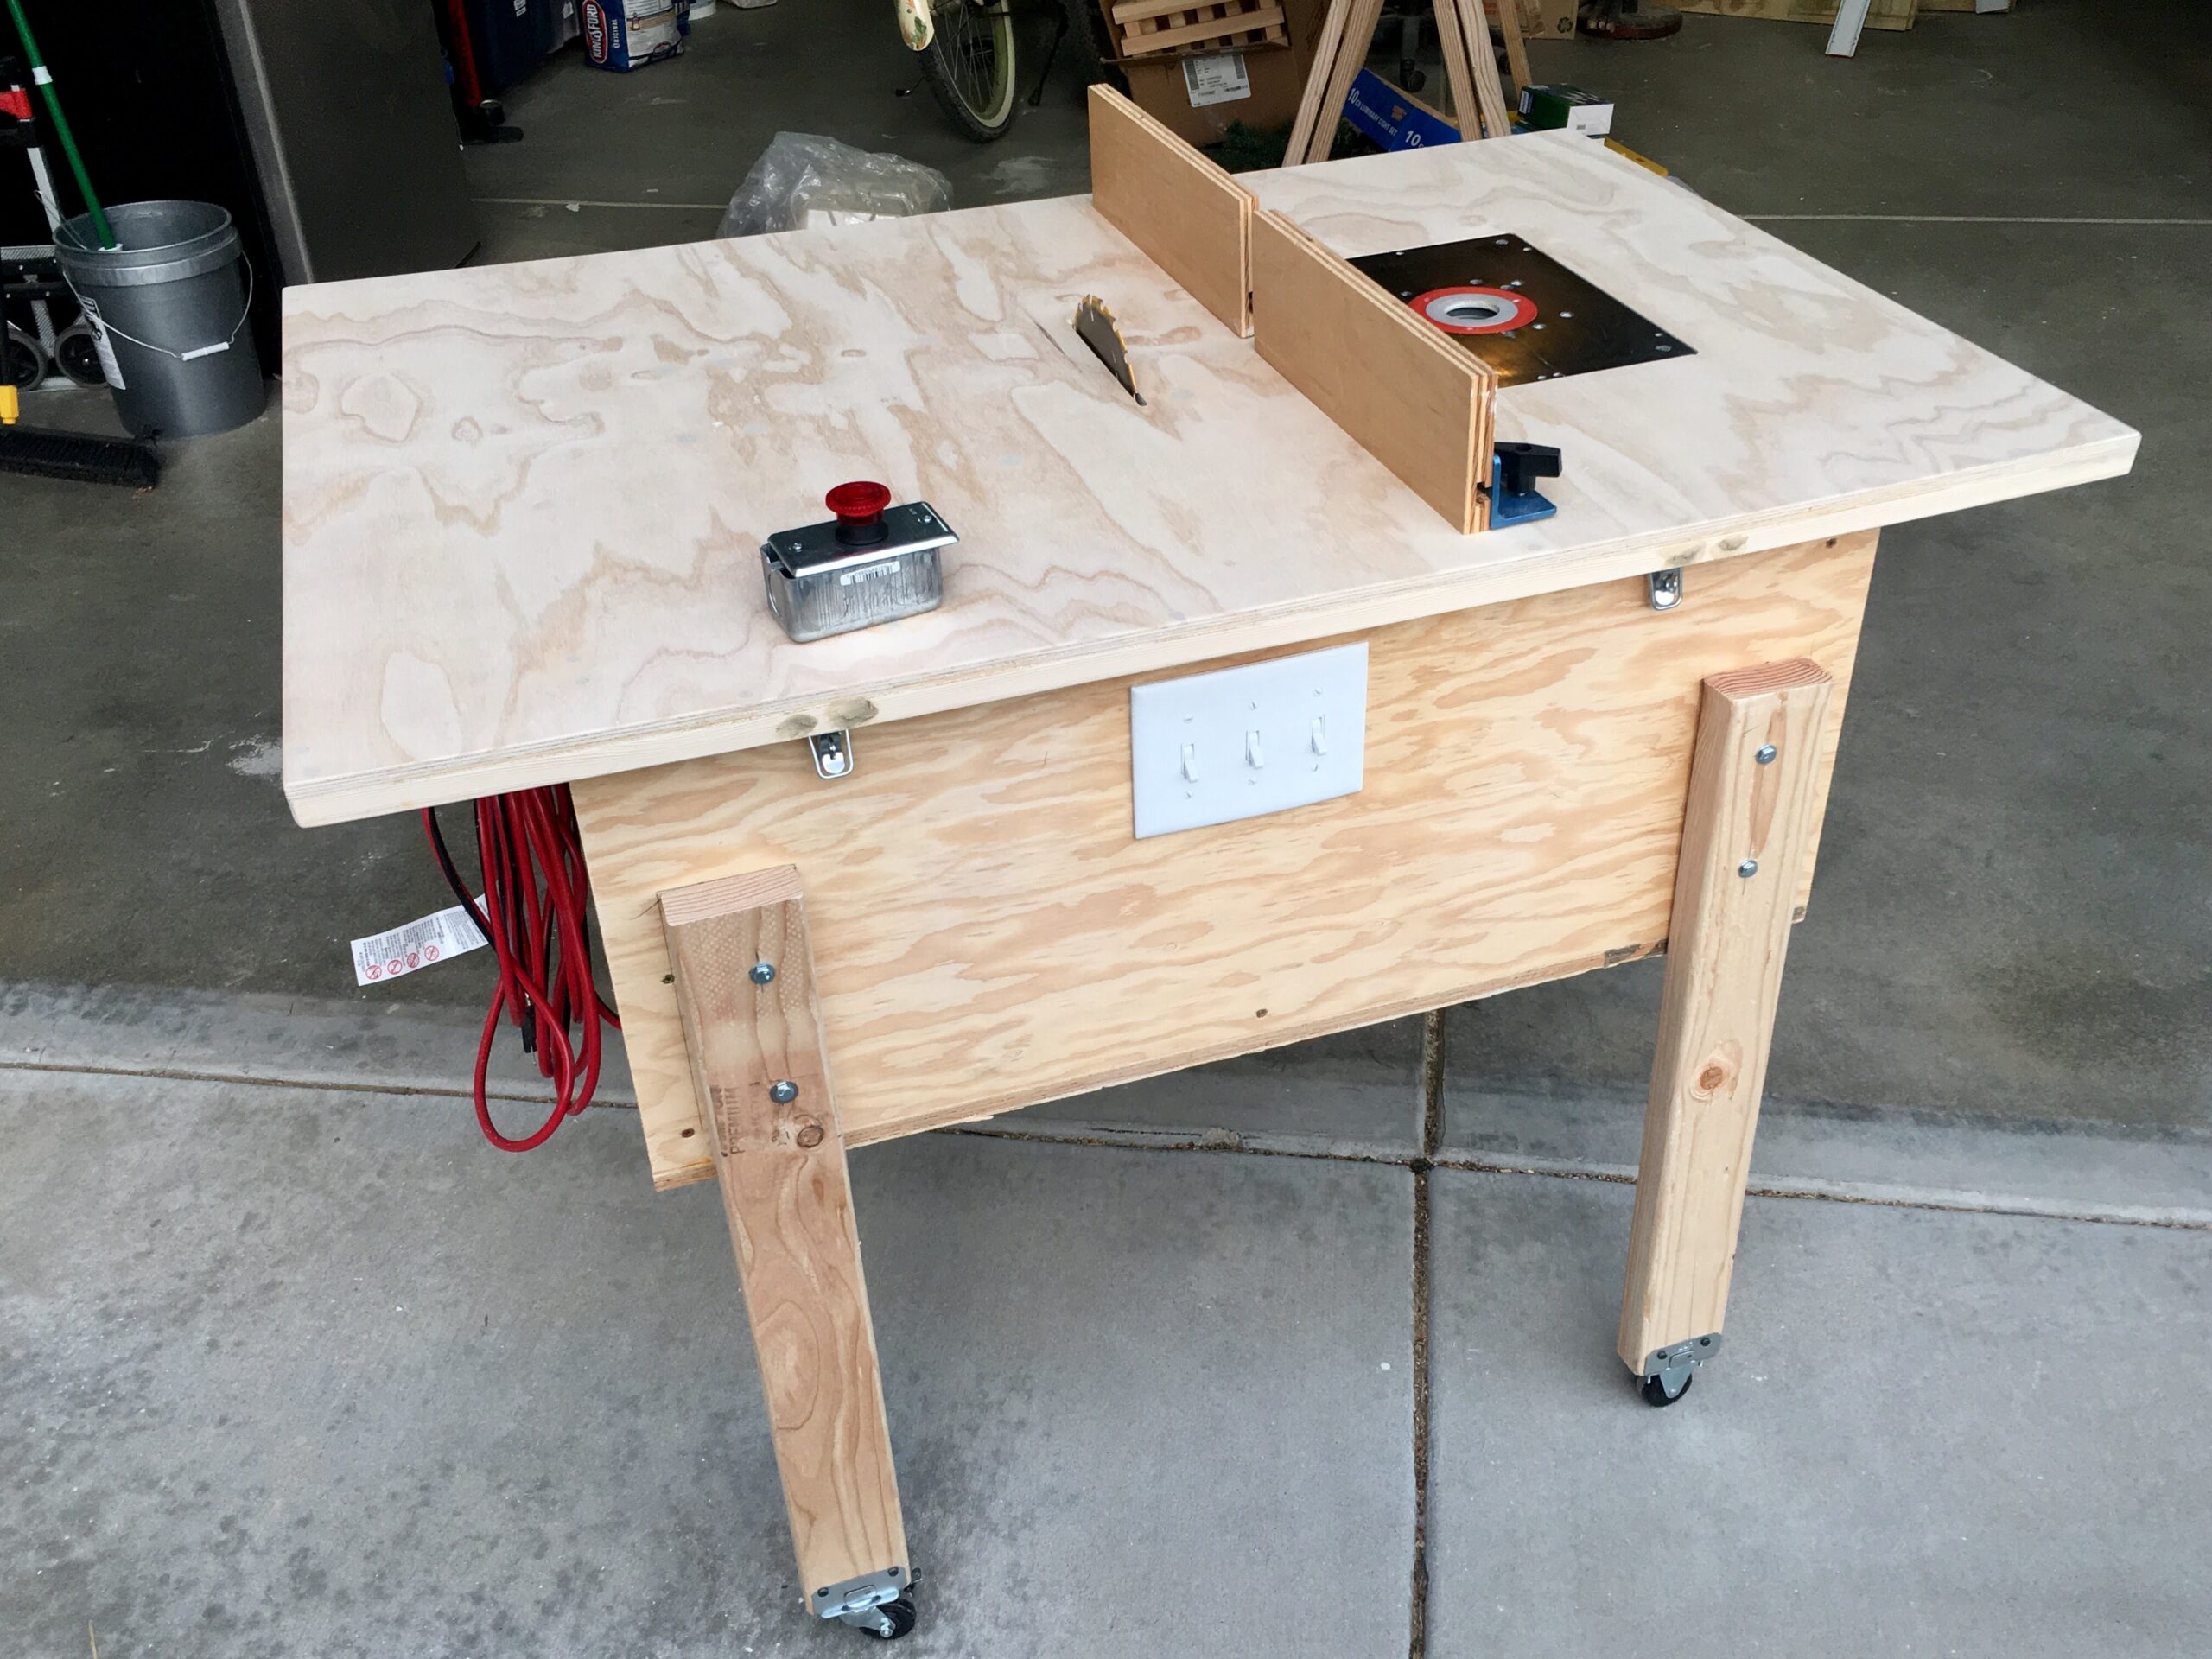
Unfortunately, I did not think at the time to take a lot of pictures during construction, so I will attempt to describe its construction. Obviously, the first step was to build a box to house everything. I opted to utilize 1/2 plywood with 2×2 bracing and 2×4 legs for the basic box. Looking at the tools I wanted to include on the table (Circular Saw, Jigsaw for use as a bandsaw alternative, and Router) I layed them out on the floor in a way that seemed to work, keeping in mind additional space to help support the wood that was being cut. Using these measurements, we constructed the box utilizing glue and wood screws.

After the main body was built, we started work on the tabletop. We again used 1/2 in plywood for the top so that we didnt take away too much usable cut depth from the two saws (the distance the blades have to pass through the wood tabletop before breaching the surface to cut the desired item). Once the top was cut to desired size, we positioned the tools where they seemed to fit best and cut the appropriate holes/slots for the blades to pass through.
Next, we had to find a way to mount the tools. Being that my current tool collection is limited, I wanted the ability to remove the tools when needed for use elsewhere. To make this possible, we utilized Prong T-Nuts that were recessed into the table surface (Available at local hardware stores). I then covered the nuts with wood putty and sanded smooth.


Some of the saws had pre-existing mounting holes in their shoe plates, however, we did have to drill a few more in order to properly secure them to the table. I currently use flathead screws to secure the tools into the t-nuts but plan to eventually change to a wingnut or knob screw setup for quicker install/removal. I already had a mounting plate for my router which I inset to keep flush with tabletop.
We added some standard hinges and clasps to secure the tabletop to the main box body and some locking wheels to the legs for easier movement. Finally, I installed some built-in electrical switches and outlets so I can control each tool individually. I don’t have a good photo of the electrical setup, but will add one soon. I wired it to a heavy extension cord so I can plug the table in at a convenient location. It is crucial that you use a heavy gauge extension cord (12g preferred) so as not to burn out your tools.
That’s about it. The build was fairly simple and was complete in a few hours. Looking back after lots of use, however, I would make a few changes (and probably will rebuild the table at some point unless I can afford a commercially built table saw before then).
- Build a thicker tabletop that can accept inset T-Track for stops/guides. A thicker tabletop would require an inset mounting plate for saws so as not to take away cuttable depth.
- Create a sloped floor to box with attachment for shop-vac in order to remove the buildup of sawdust.
- Add side vents to help keep tools cool during longs running periods.
- Add an emergency power stop switch for extra safety. (I bought one as seen in pictures, but it wasn’t rated for high enough amps)