
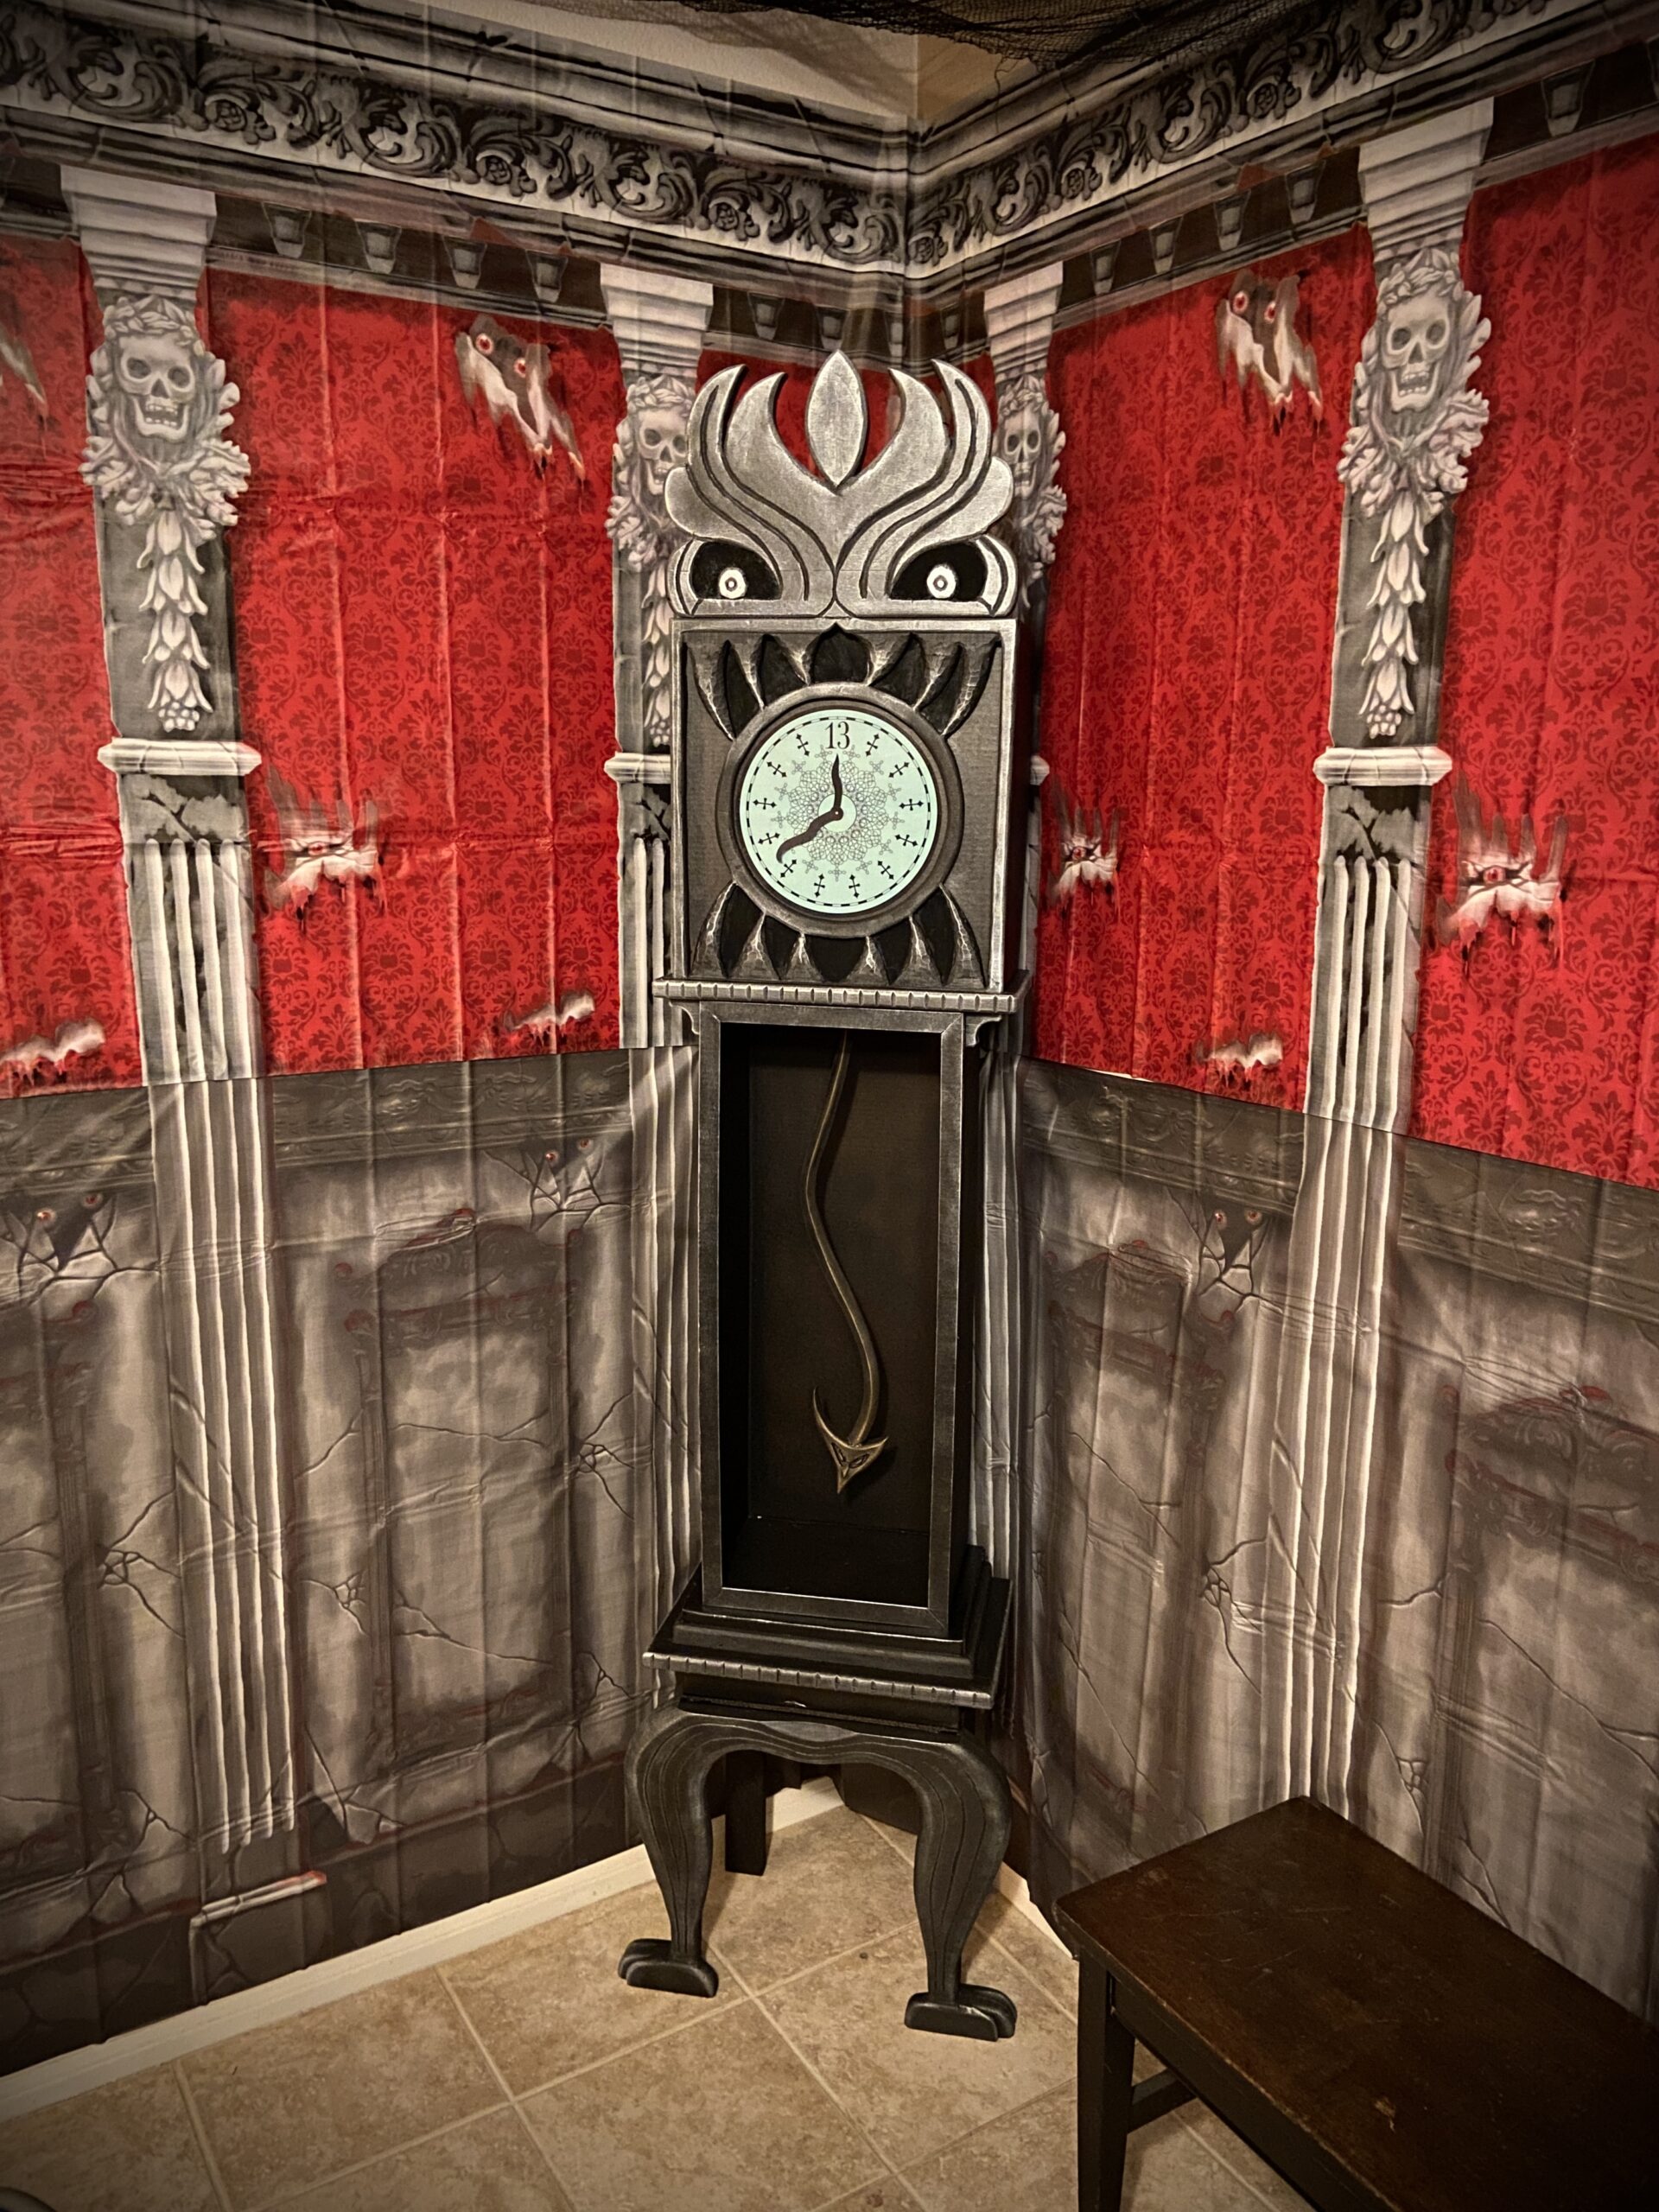
For Halloween this year, my wife and I decided to host a Murder Mystery Dinner with some of our friends. Having attended a few mystery dinners ourselves, we opted for something similar to the CLUE movie. Along with a CLUE style game, we wanted to theme the house in an old abandoned (and slightly spooky) style. Of course, one of the first props we thought of was the clock from the Disneyland Haunted Mansion ride.
After looking around online, I found a few sites with info on building a DIY haunted clock. One of the best can be found here: http://diynmbcprops.blogspot.com/2013/05/disneylands-haunted-mansion-13-hour.html
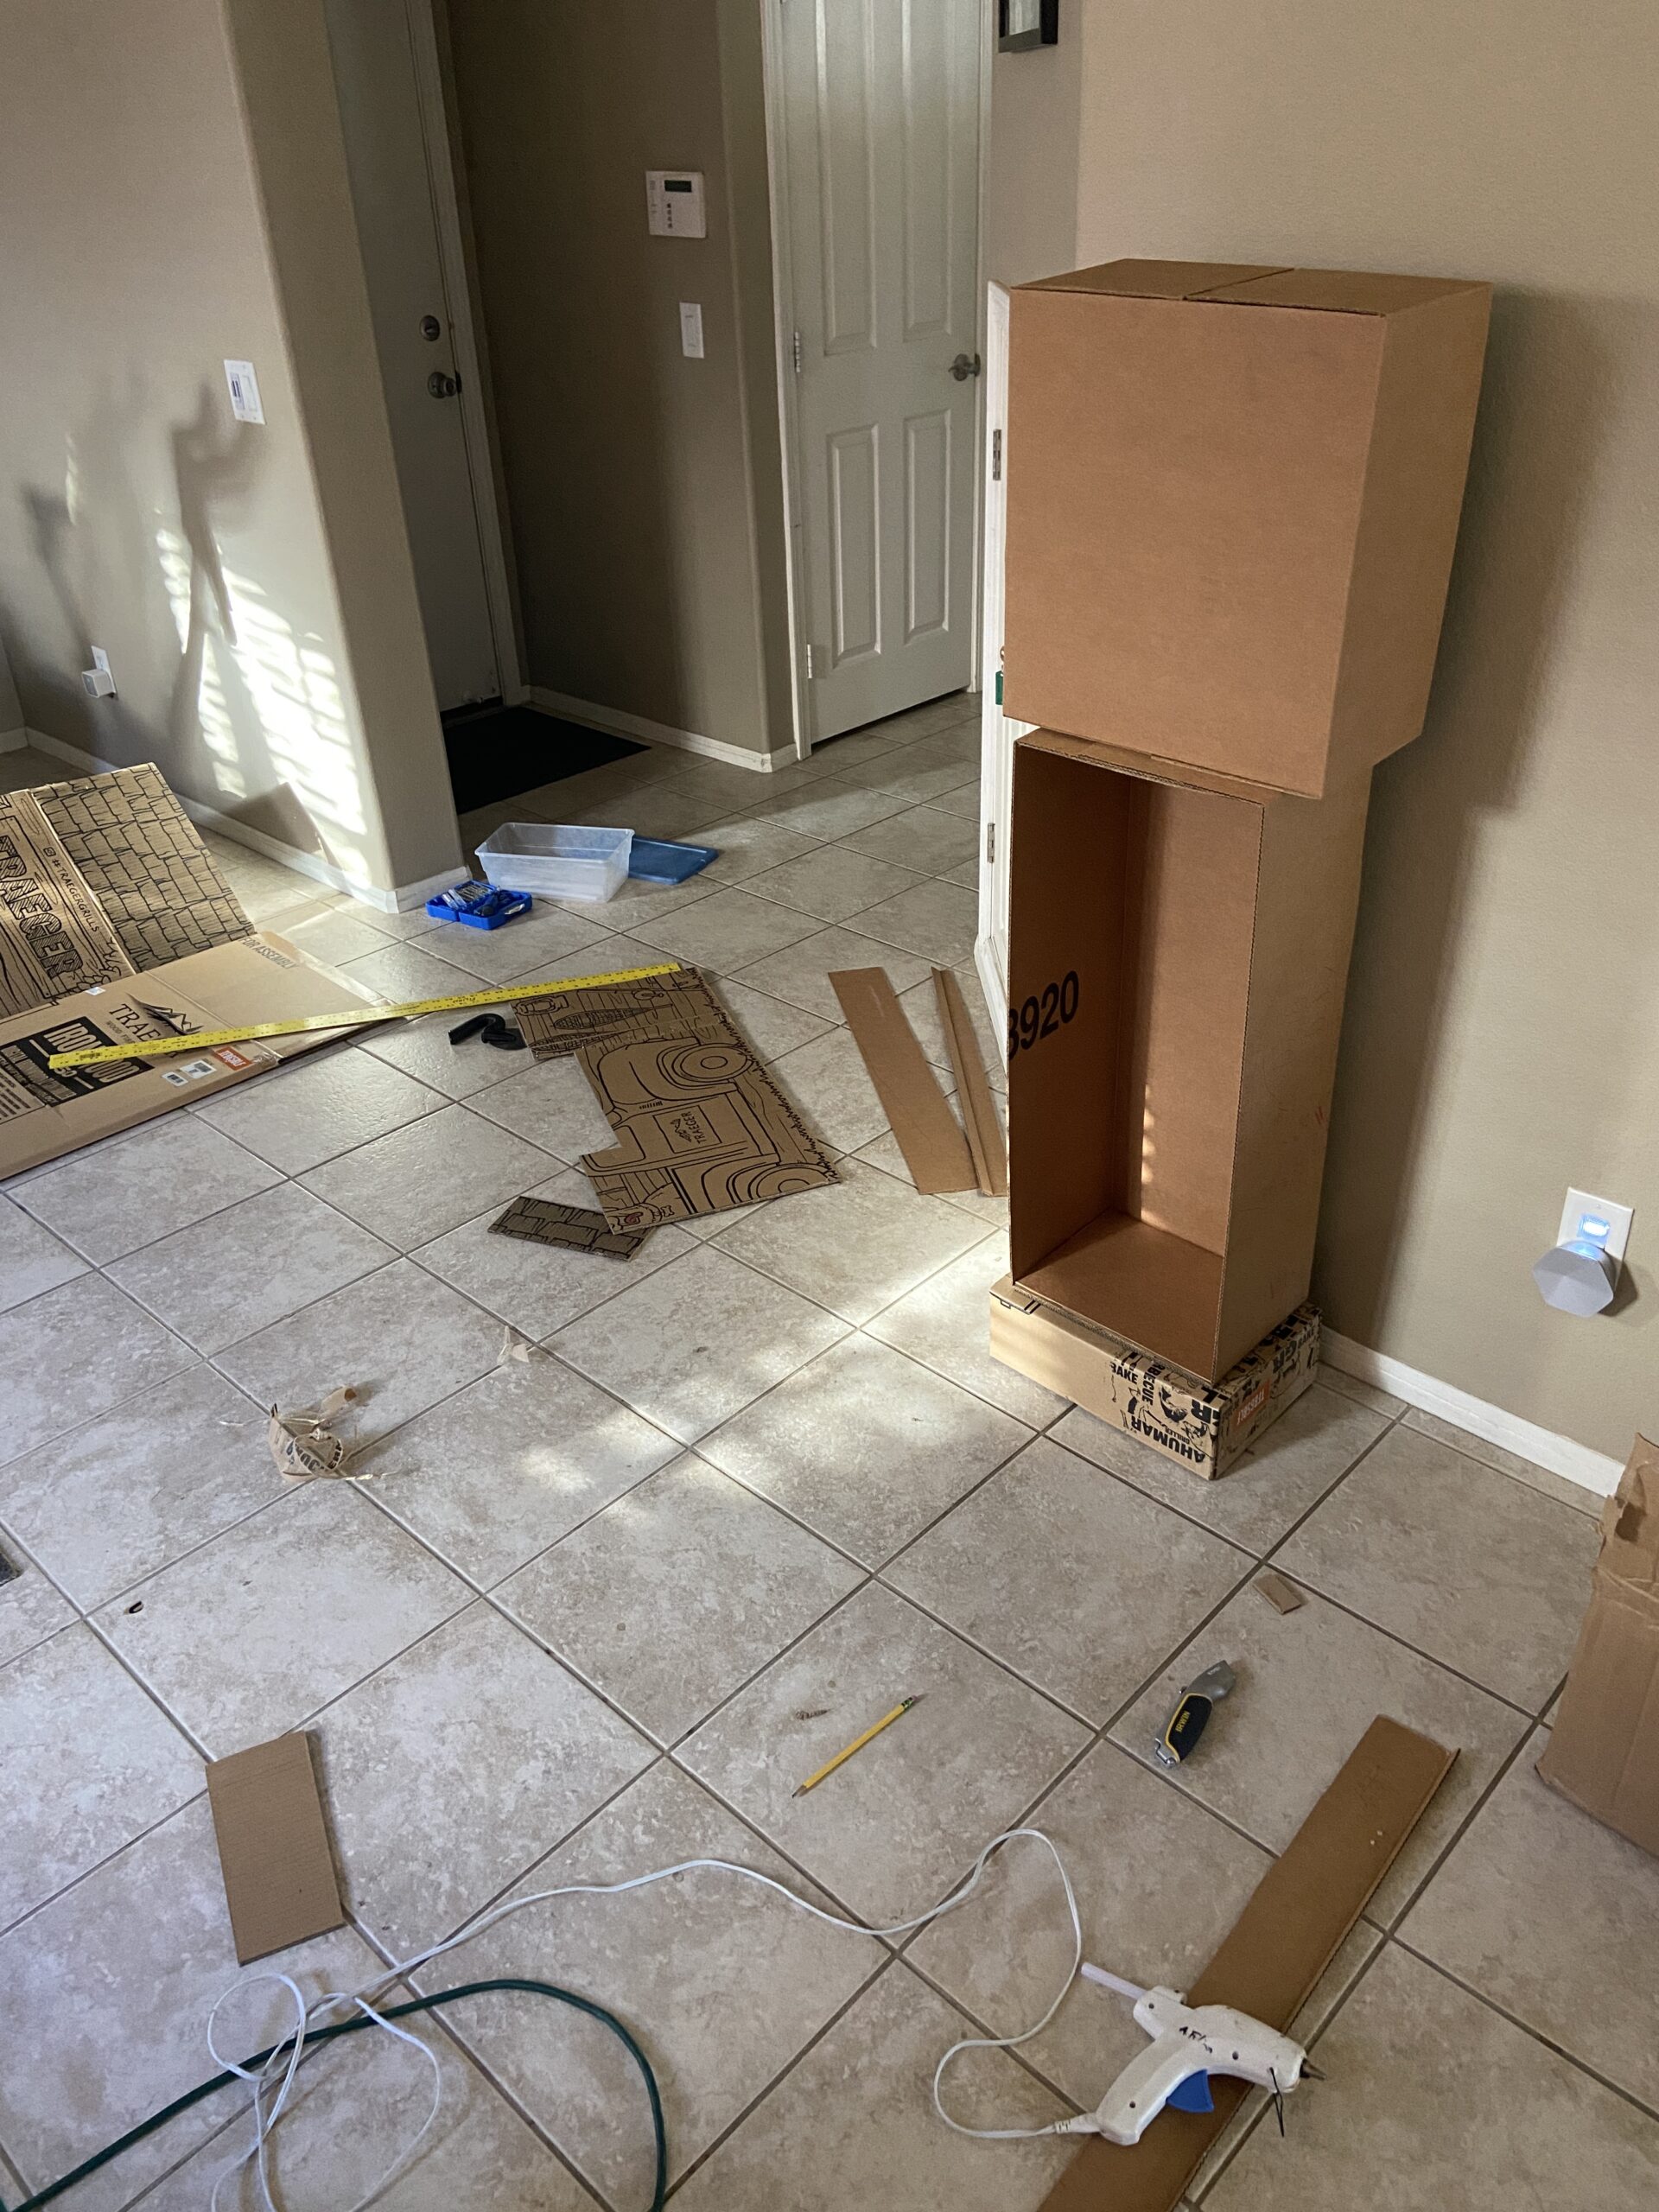
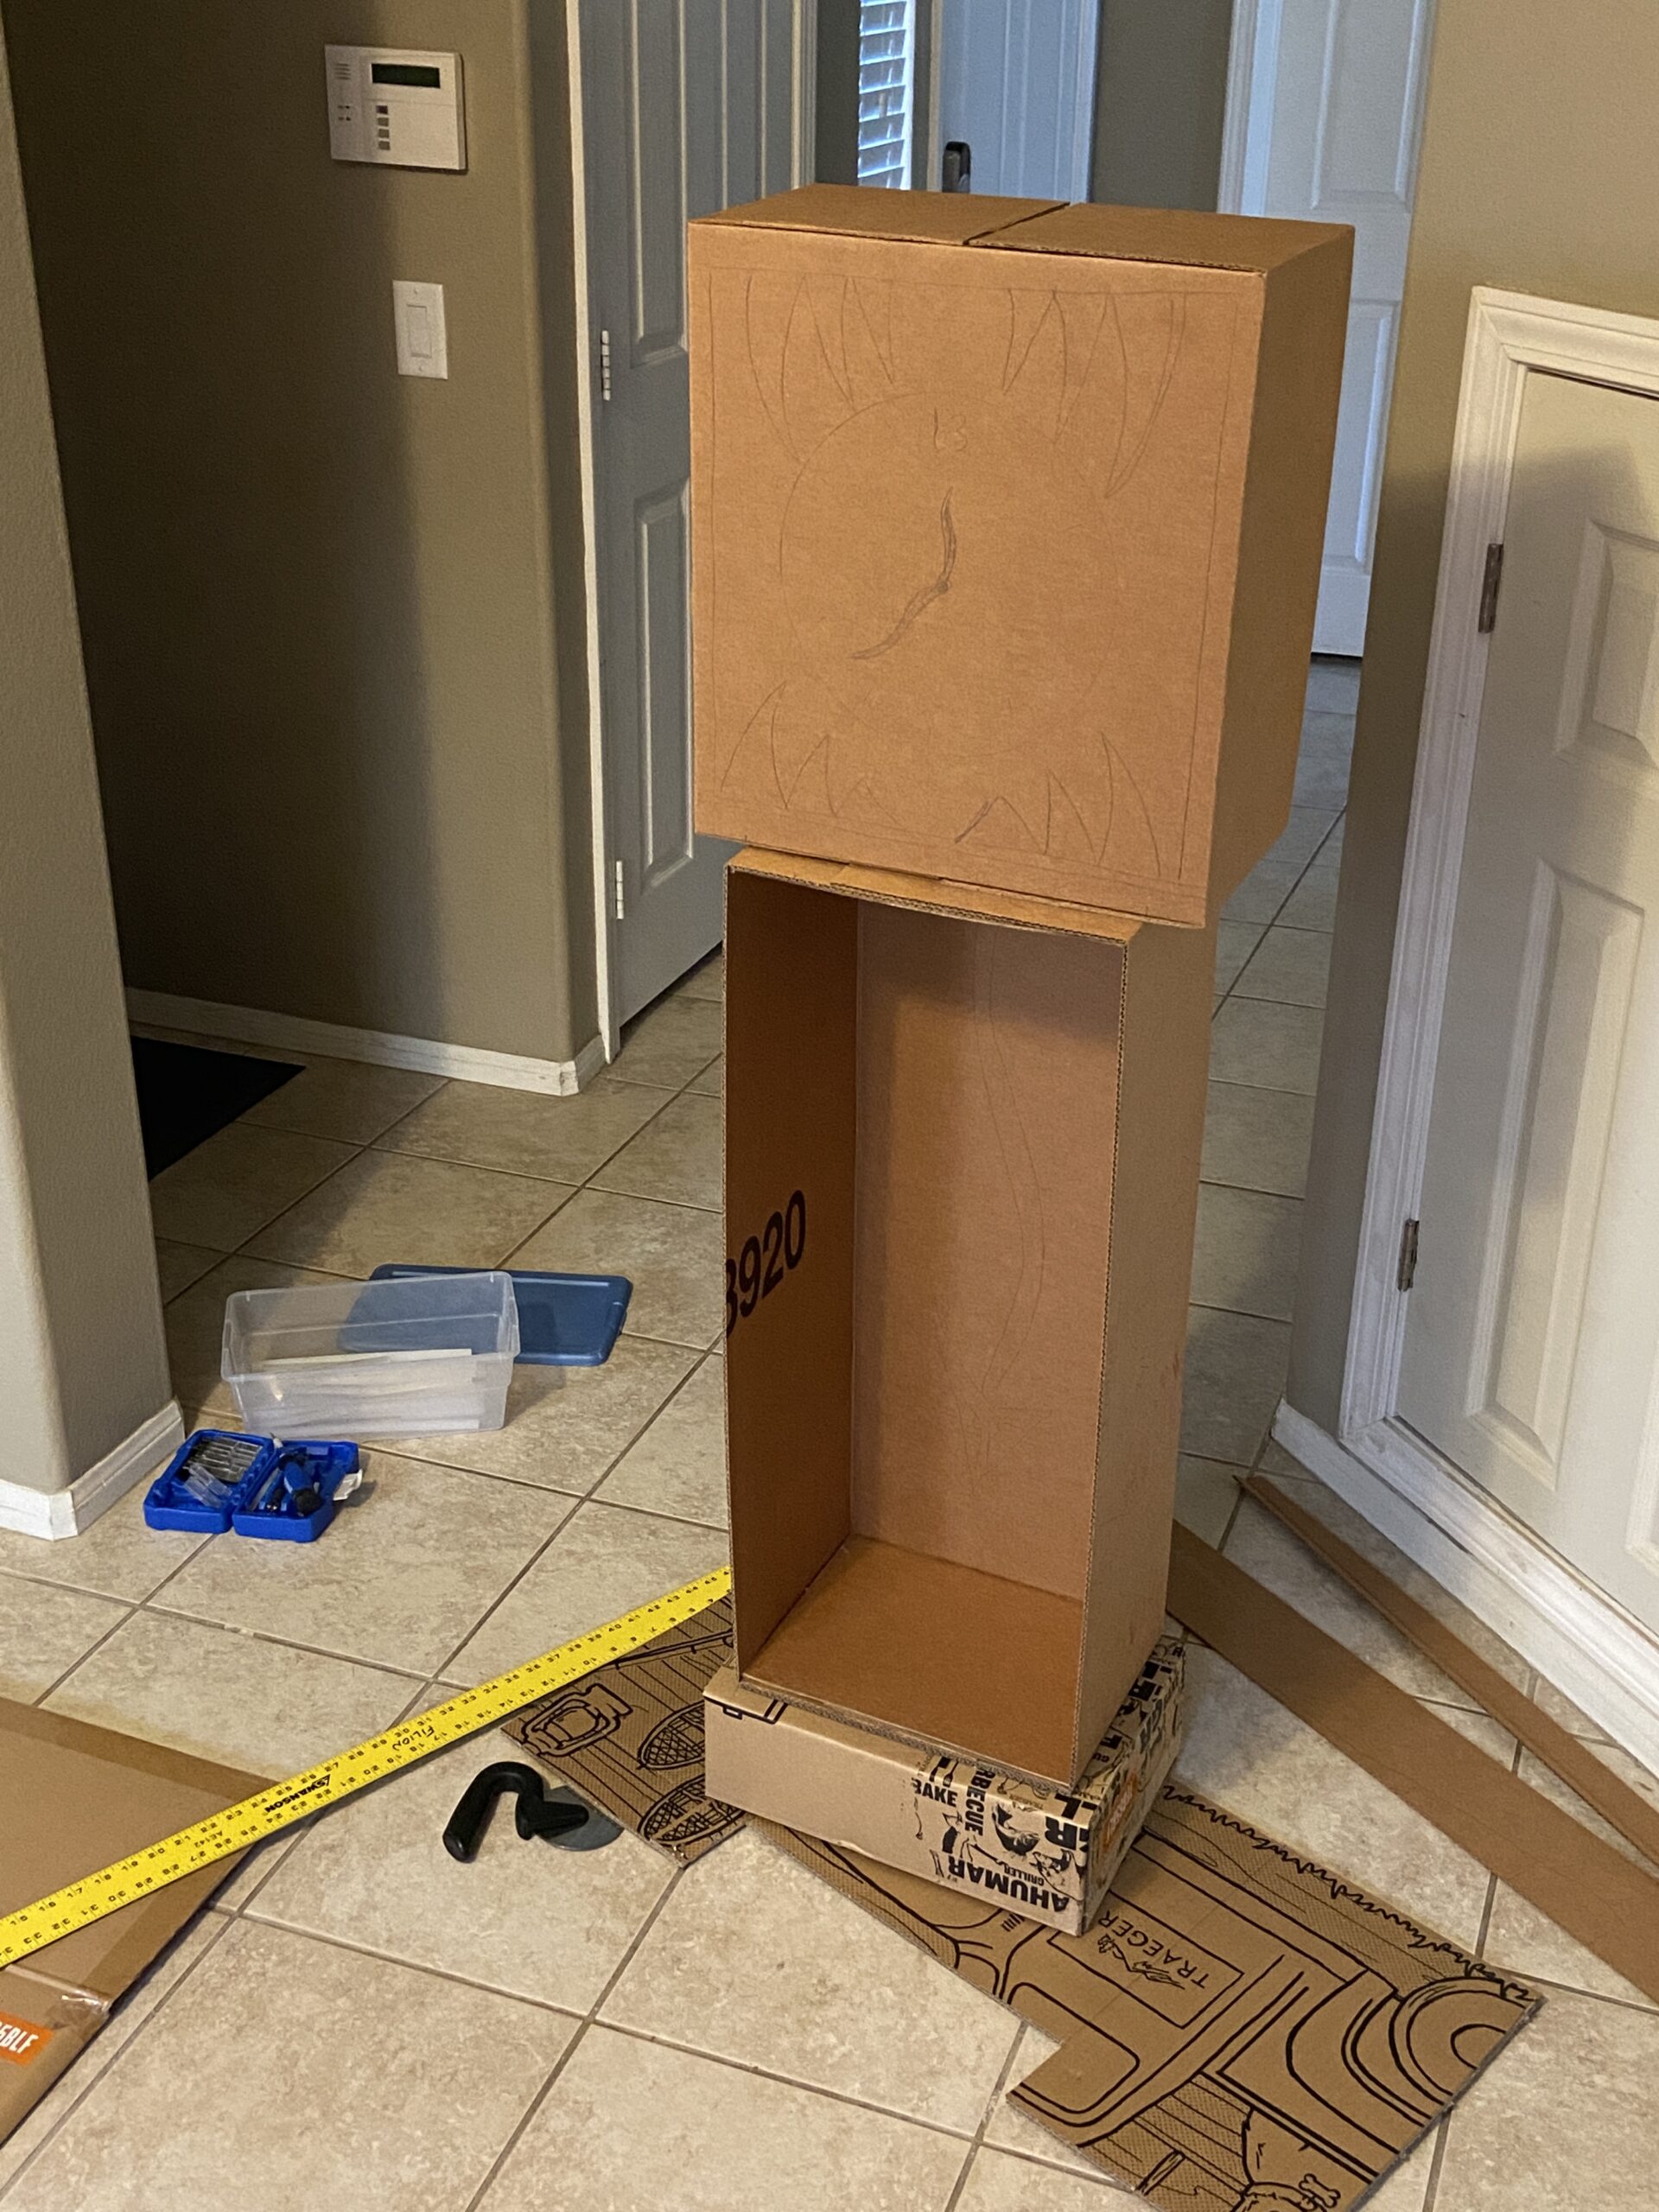
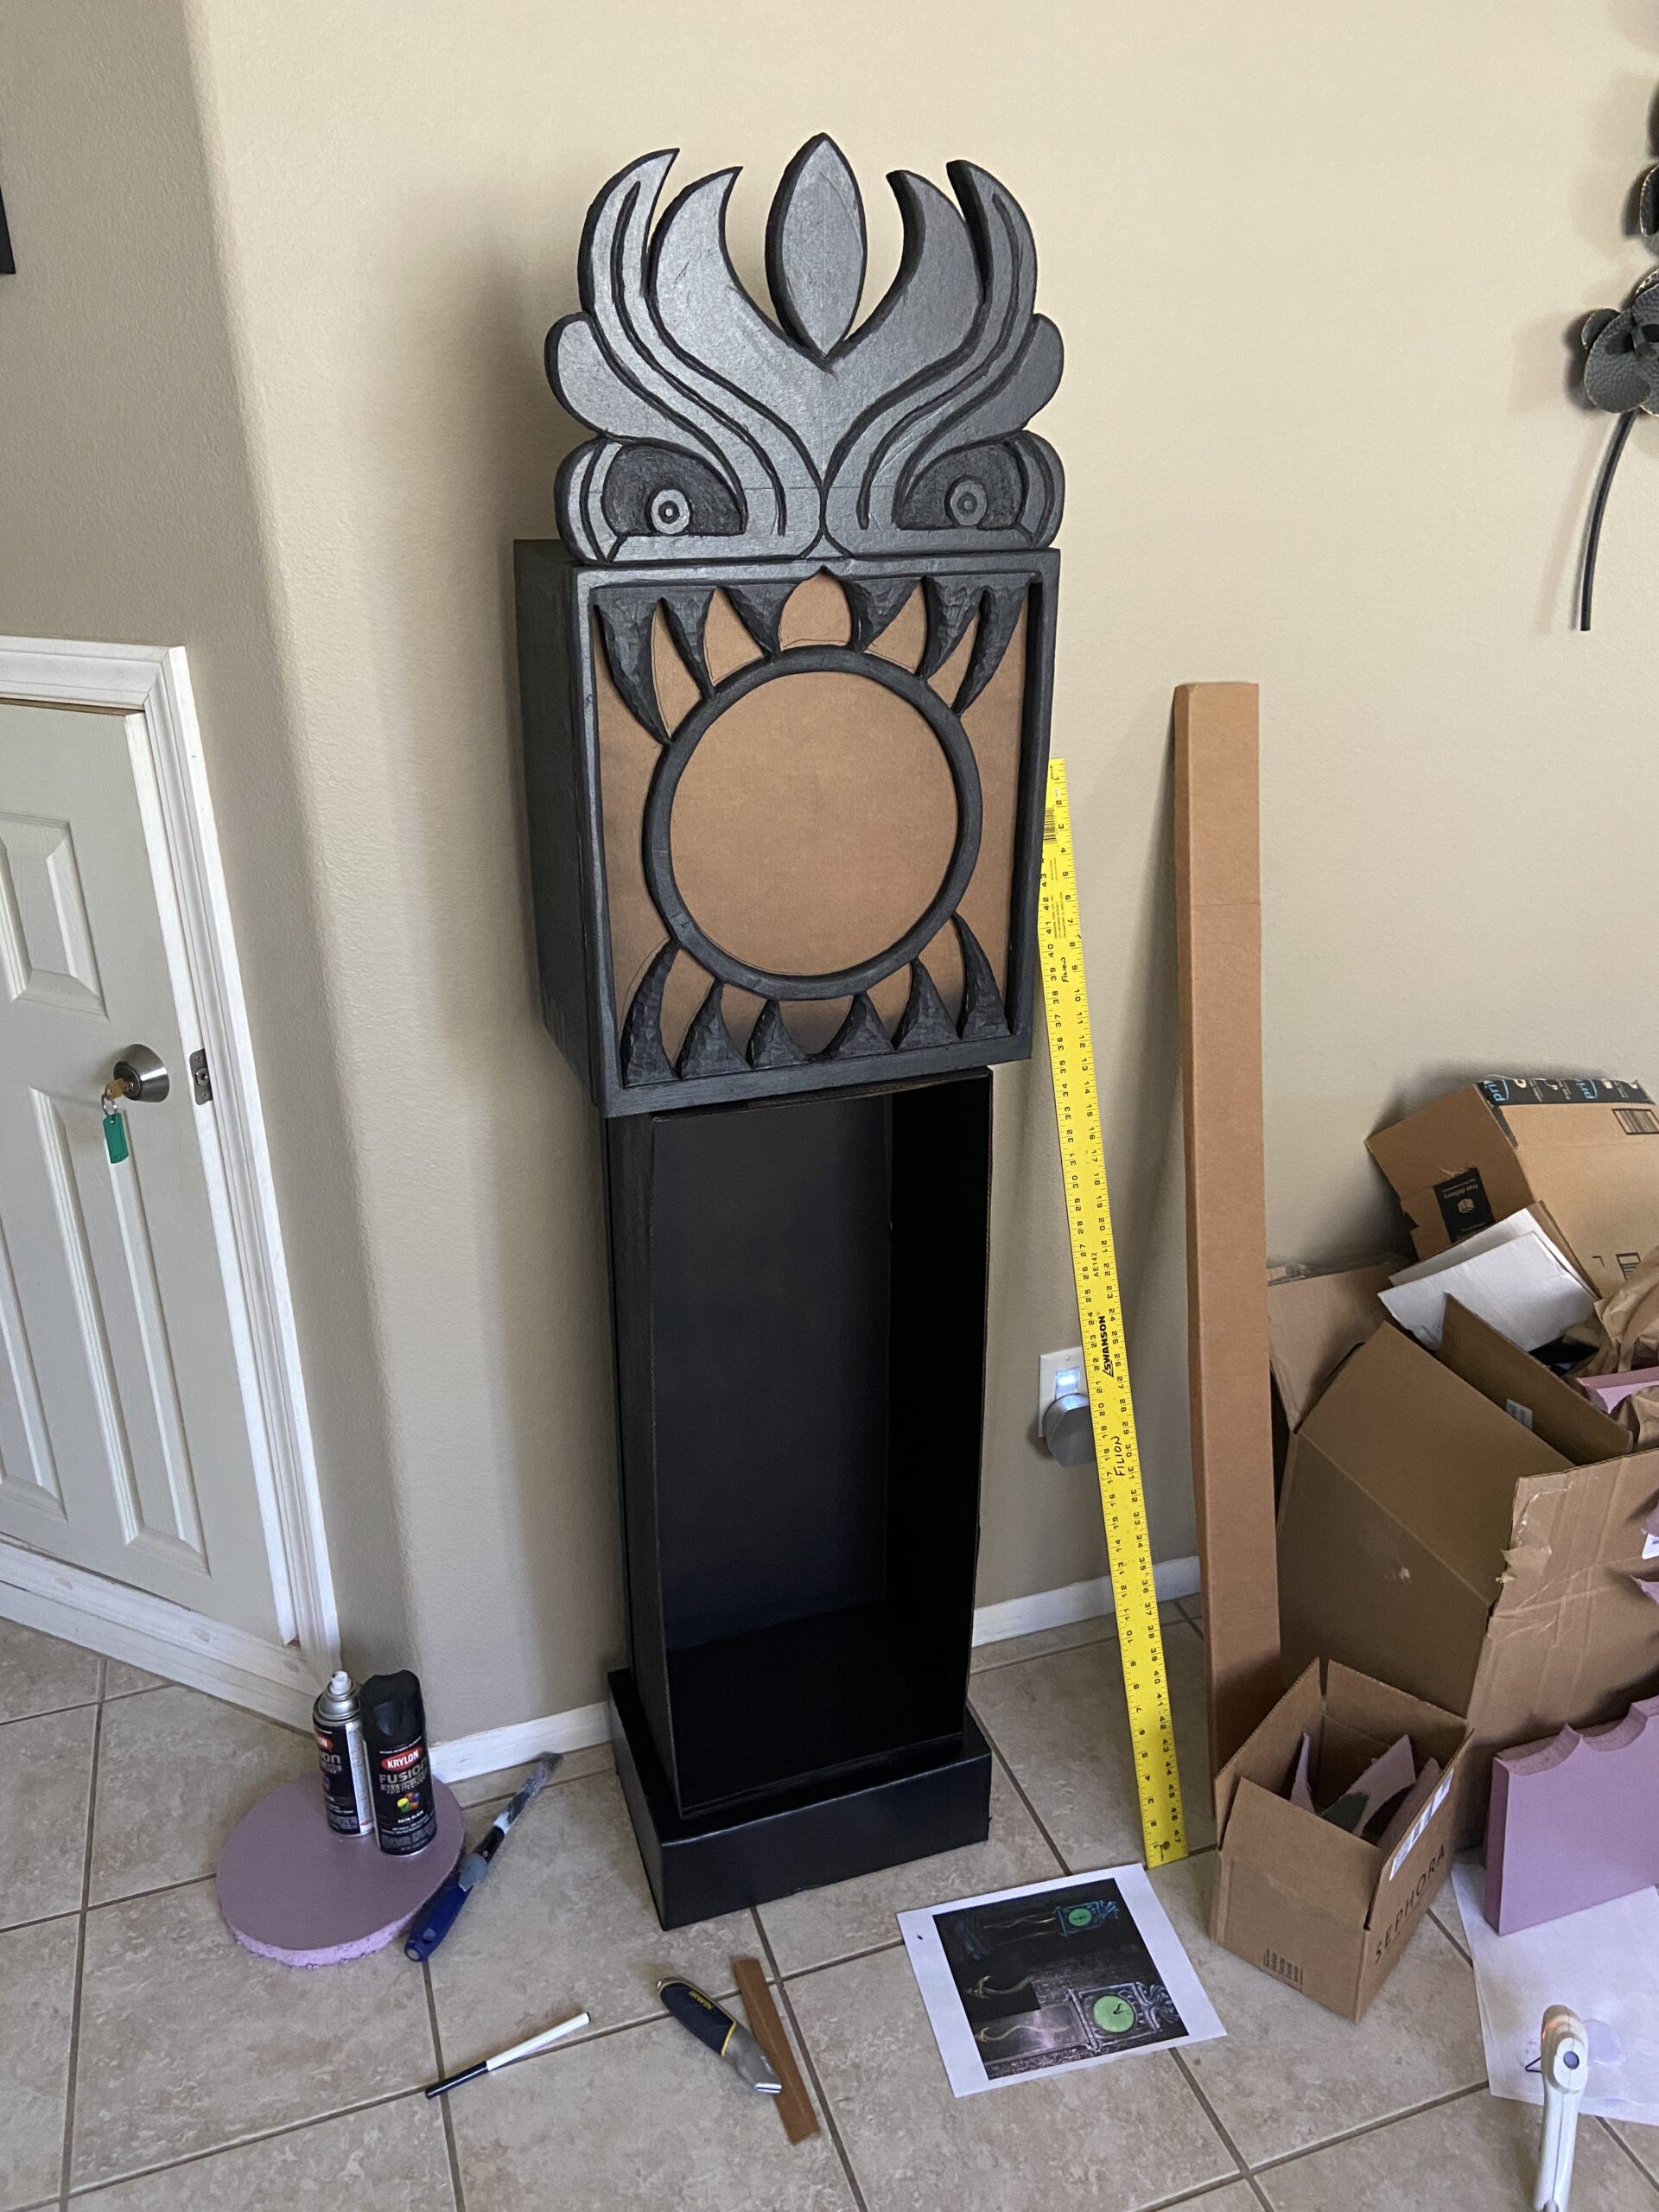
I was unable to find the full sheet 2″ foam listed on the DIY site, so I had to build a hybrid clock. I started off with utilizing some cardboard scraps to build some custom sized cardboard boxes that I stacked to form the basic shape. I don’t have the exact dimensions, but I used some of the numbers from the above DIY site for guidance and wanted the final design to be almost 7ft tall. It’s best to utilize a steel ruler or wood board to crease/bend the cardboard by pushing it down into the cardboard while carefully folding it. Otherwise the cardboard is likely to tear or self crease on the internal ridges and not necessarily where you want the fold to end up.

After the basic shape was complete and glued together with hot glue, I covered the entire structure with matt black spray paint. NOTE: foam will melt due to the solvents found in spray paint. You can utilize spray paint on the cardboard prior to adding foam accents to save time. Once any foam has been applied, you are stuck with hand brushing acrylic paints.
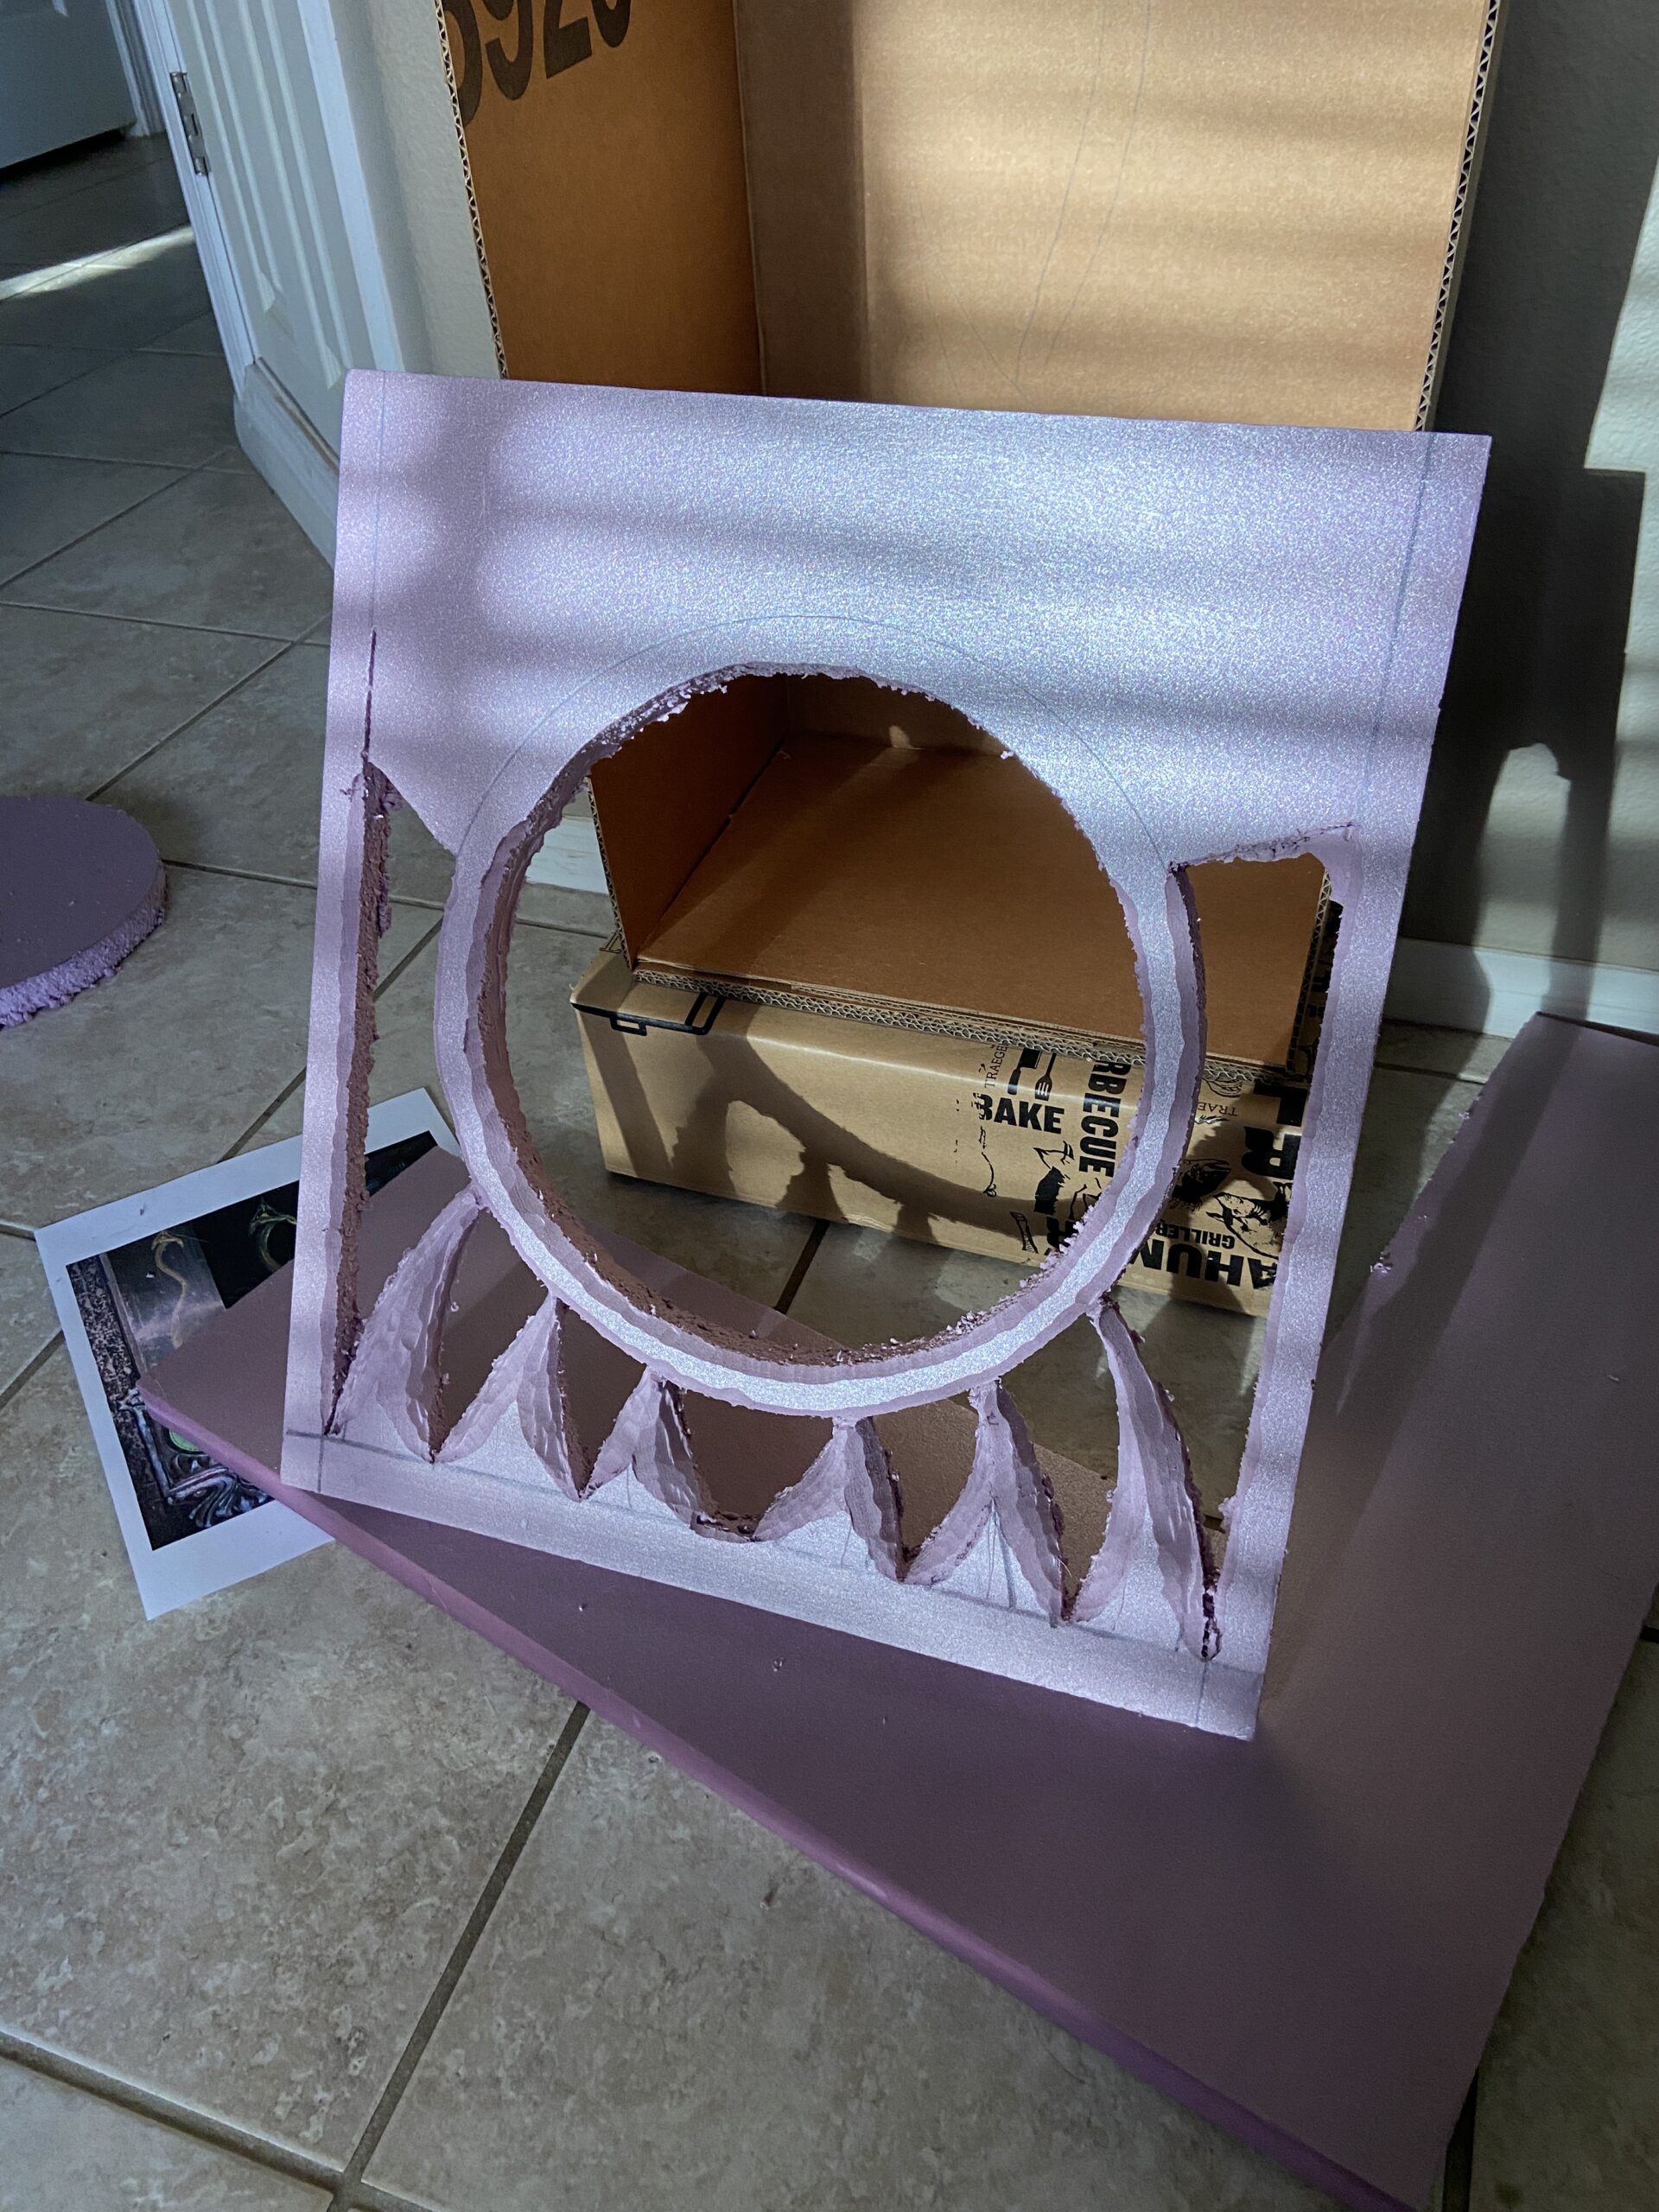
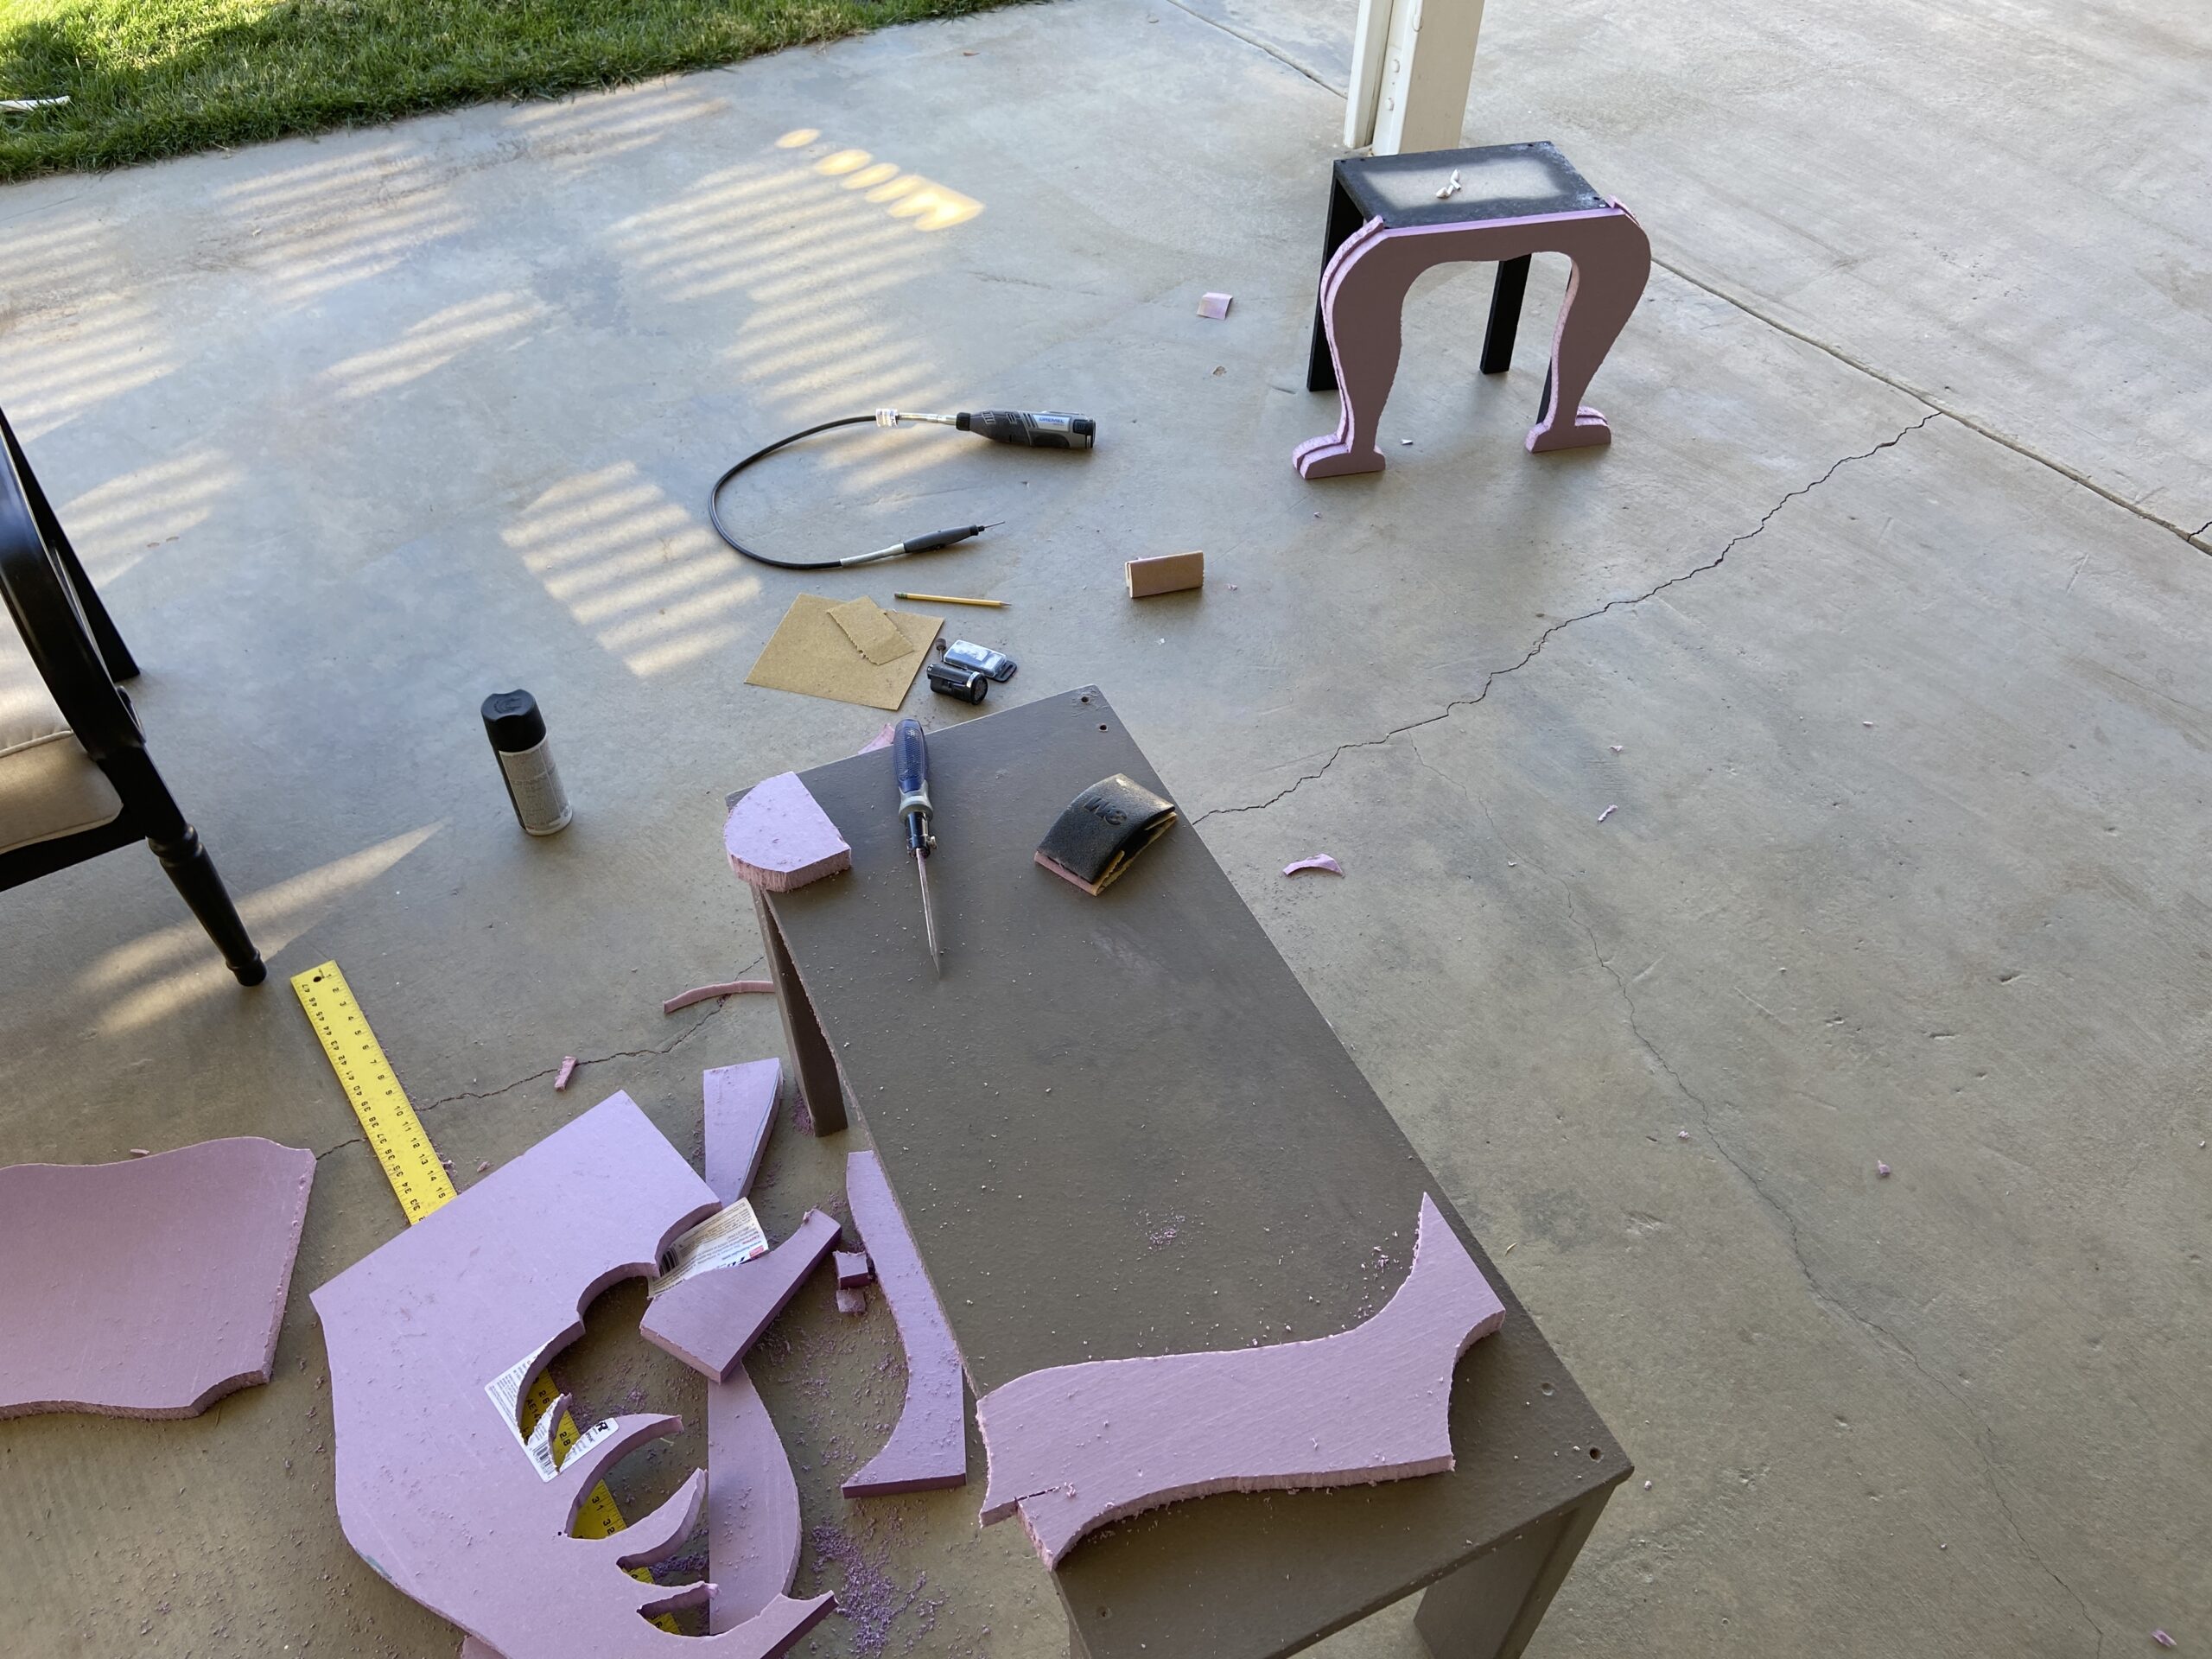
After the spray paint had dried, it was time to start on the foam accents. As I stated earlier, my local Home Depot did not carry the 2″ 4’x8′ foam described on the DIY site, but it did carry 1″ thick 2’x2′ sheets for around $5 ea.
https://www.homedepot.com/p/Project-Panels-FOAMULAR-1-in-x-2-ft-x-2-ft-R-5-Small-Projects-Rigid-Pink-Foam-Board-Insulation-Sheathing-PP1/203553730
The foam panels are high-density foam which makes them easier to cut and can be sanded or carved into desired shapes. However, using a knife can still be tricky. I found a fine tooth blade from hack-saw or drywall saw worked really well for rough cuts. For shaping/carving, I utilized my Dremel with a tile cutting bit or sander bit as they allowed fine detail work. To finish the areas, 80 grit sandpaper allowed fast shaping with 100+ grit to give a nice smooth finish that looked like wood. Also, a sanding block (like those used for drywall finishing) worked great for sanding in the little grooves for the molding accents. It definitely takes time, so don’t expect to rush through this process. Also, it is VERY messy, so I advise to cut/carve outdoors or somewhere easy to clean.
I used a pencil to sketch out my design on the foam prior to cutting. (be careful on creating any indents into the foam while sketching as it will show on the final product unless you sand them out.) I utilized the pictures on the DIY site as well as the following sites as my design guides.
https://skfb.ly/6ASzv
https://i.imgur.com/kLL73uCl.jpg

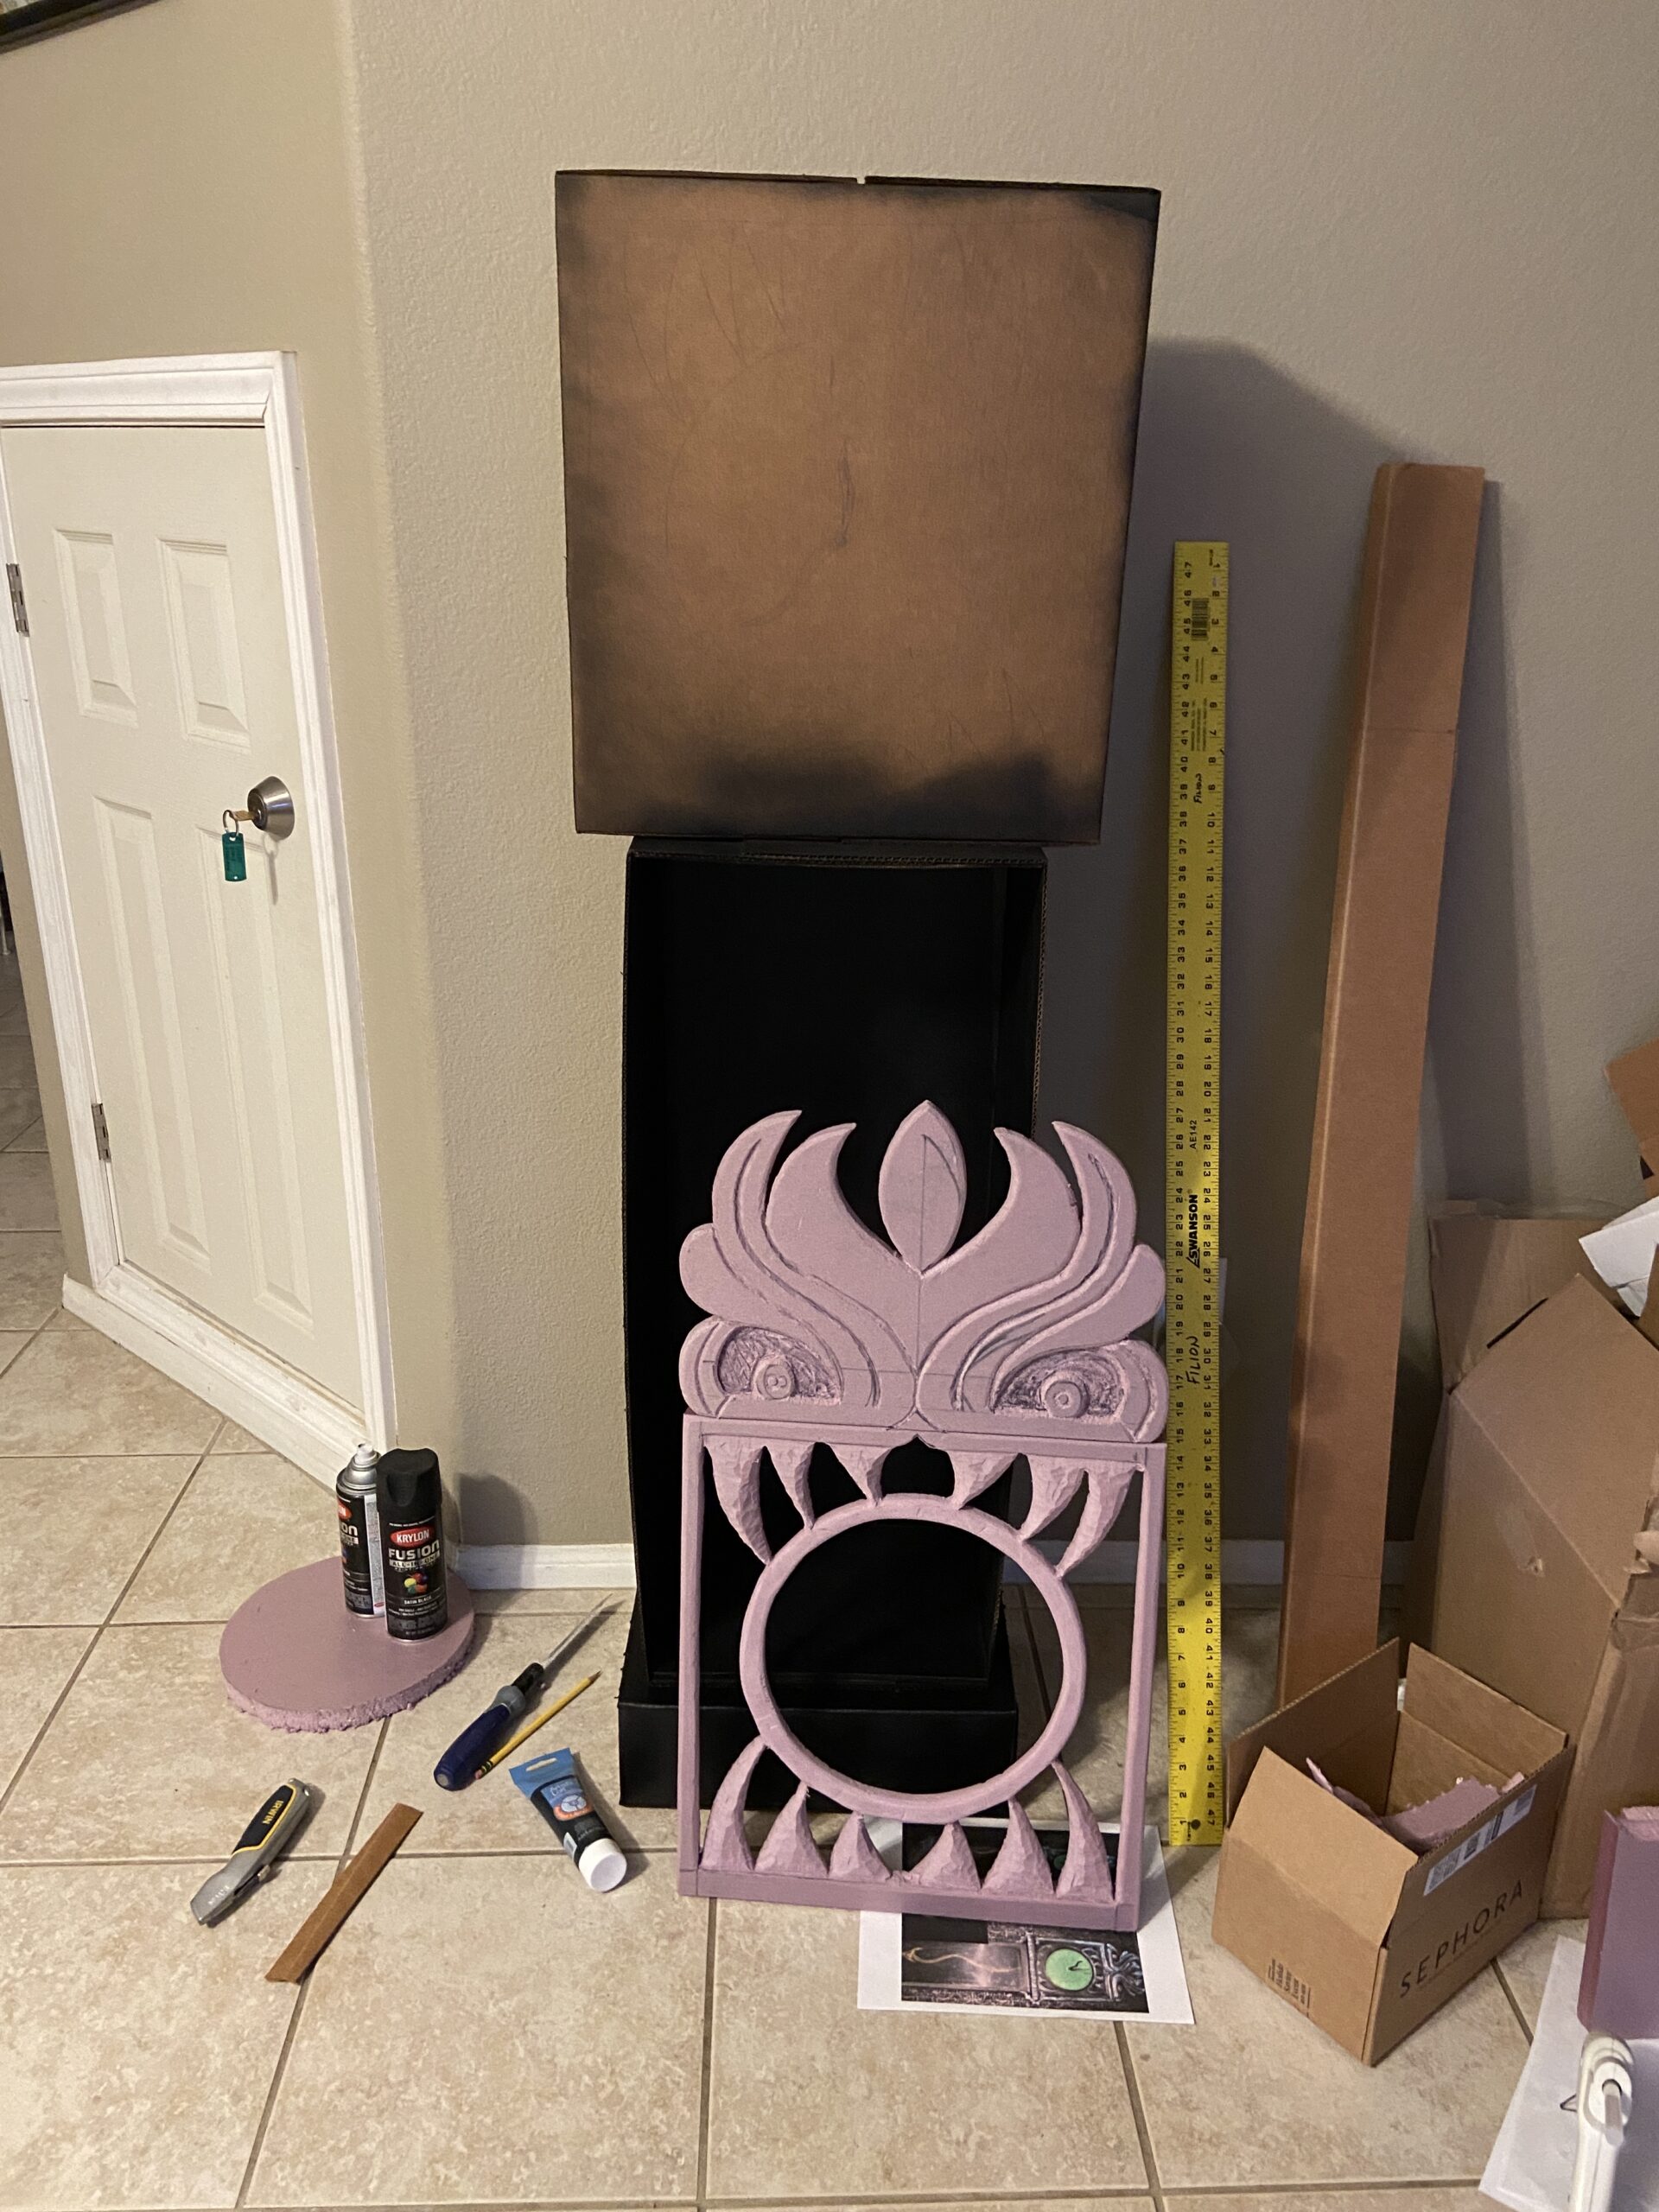
After hot gluing the foam onto the cardboard, we painted everything a metallic black utilizing acrylic. Be careful about your hot glue gun as 300+ temp guns will melt the foam. I then began adding strips of accent moldings again using the foam. I wanted to add more to the final design but was cut short due to time limitations.
For the base, I built a wooden base out of scrap wood to give the final design height and also to have something to mount the faux foam legs onto. The wood was spray painted prior to adding the carved foam leg front.

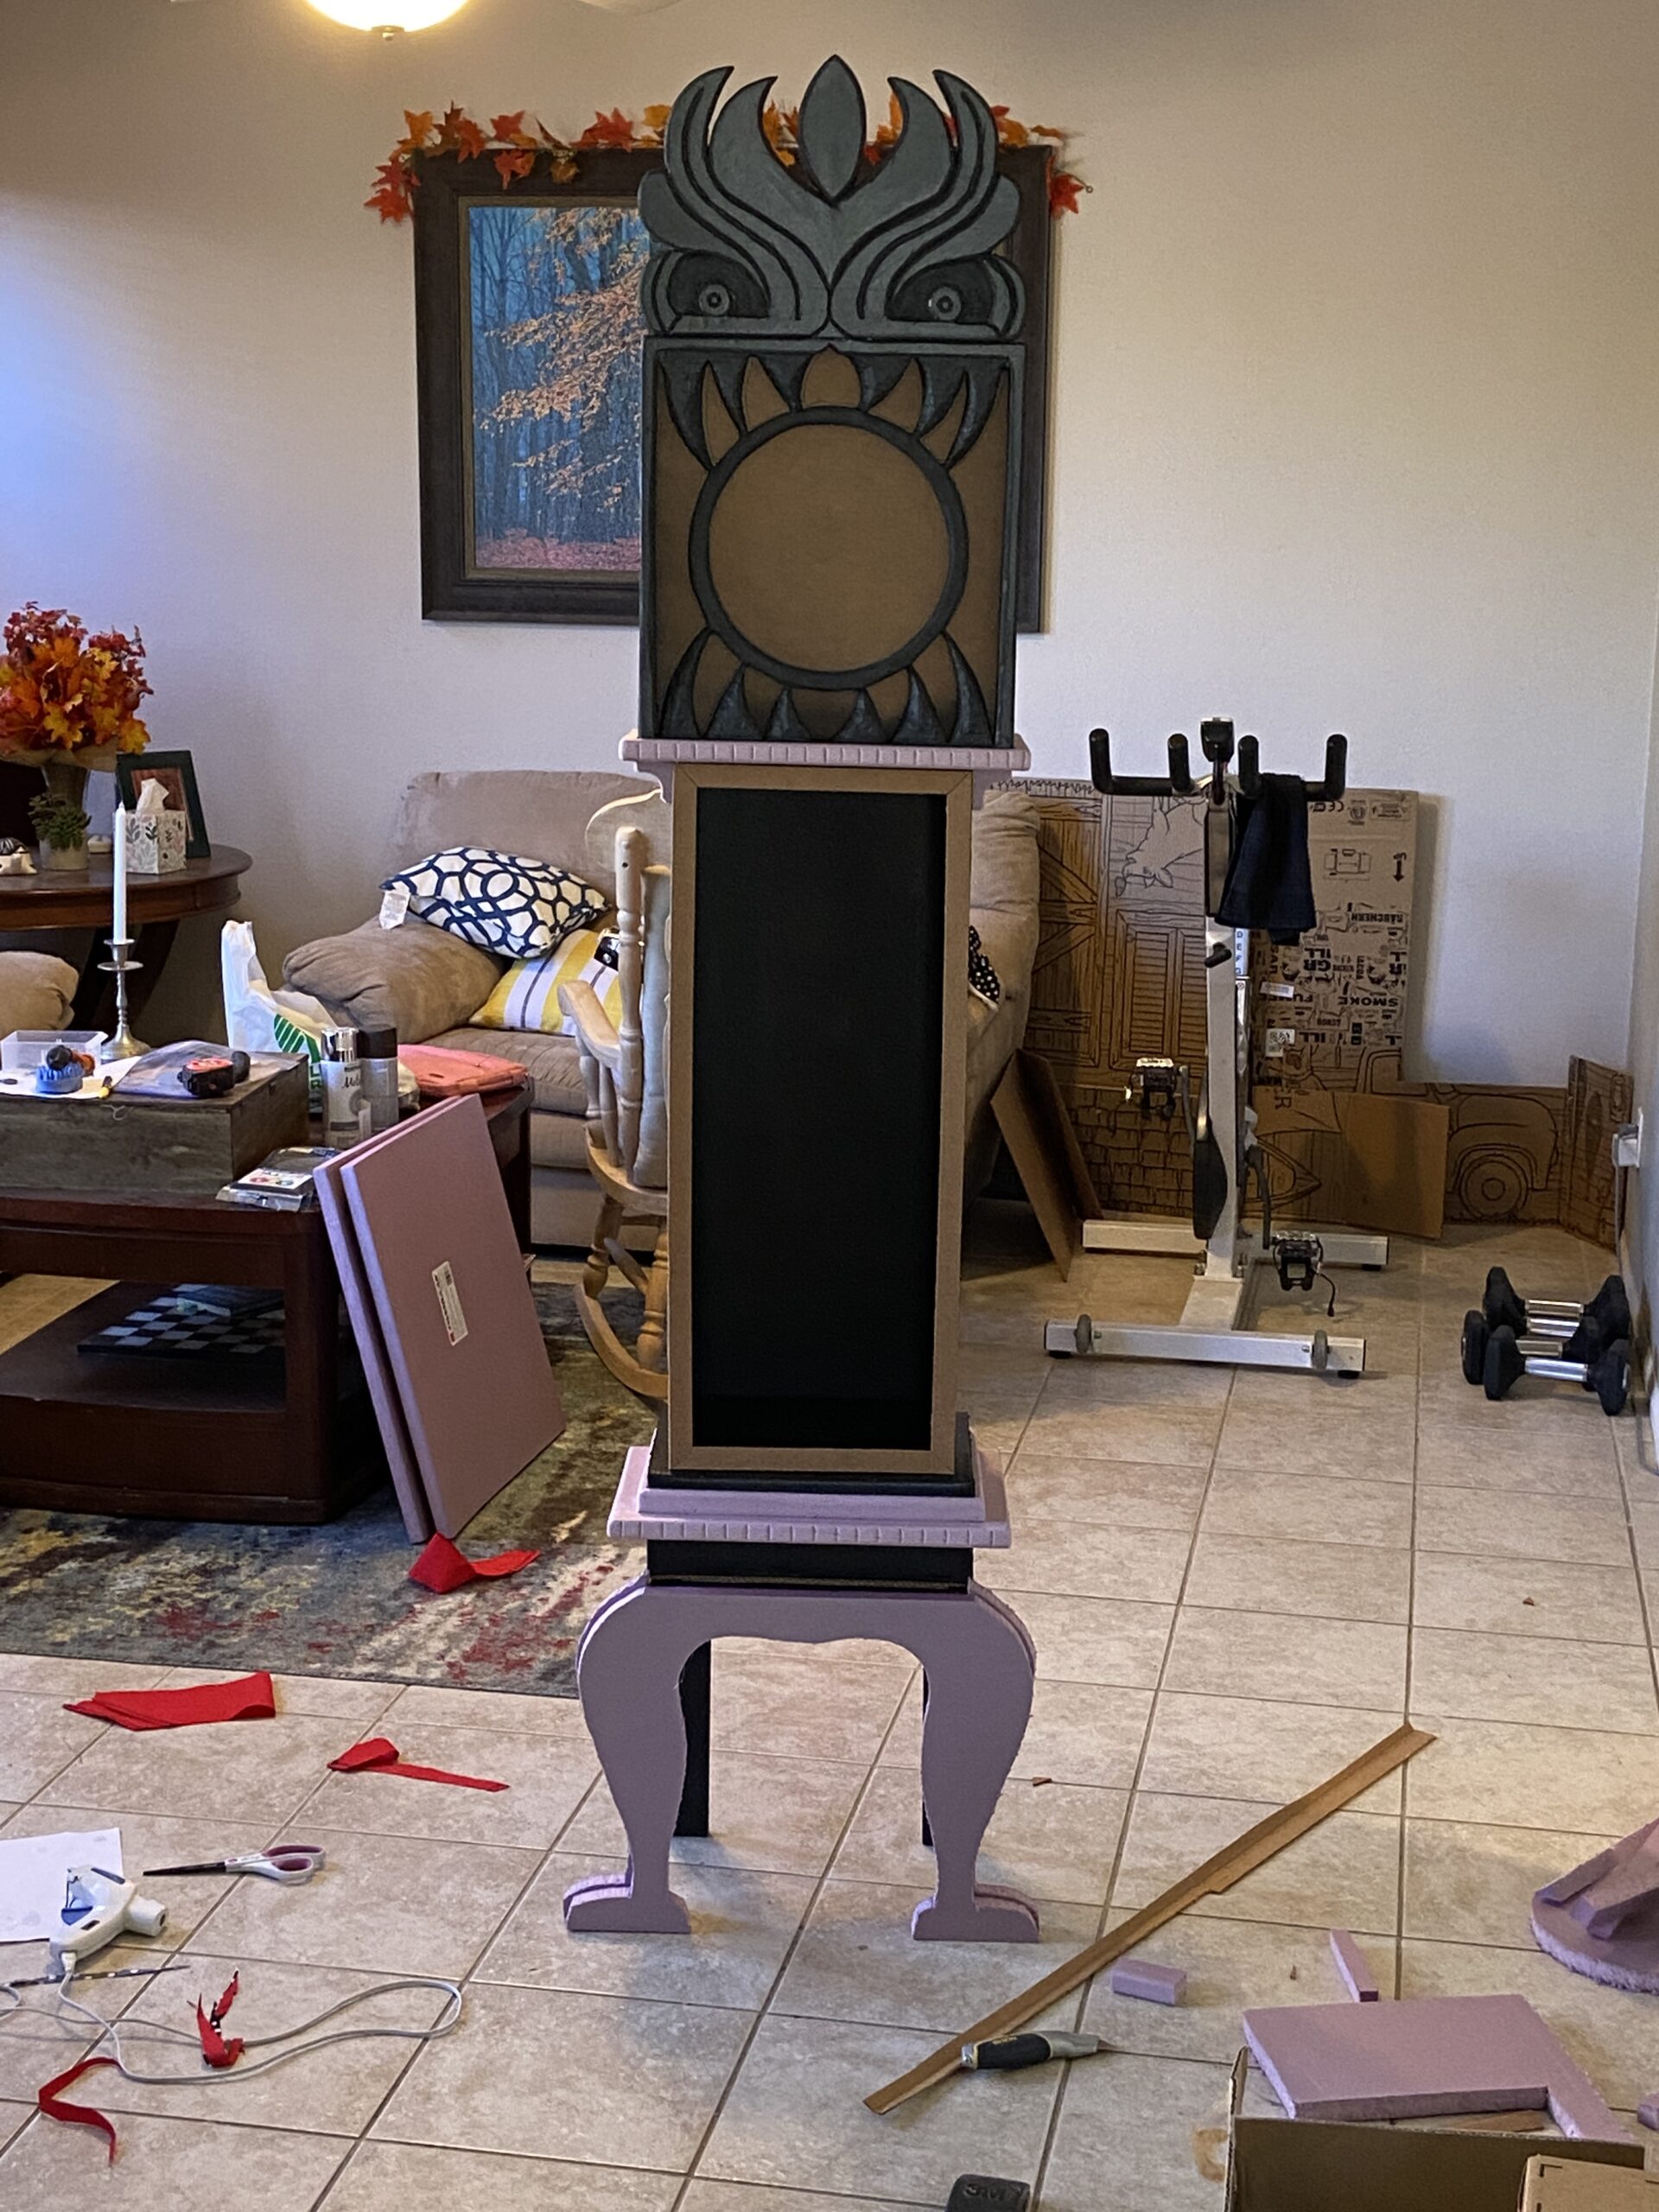
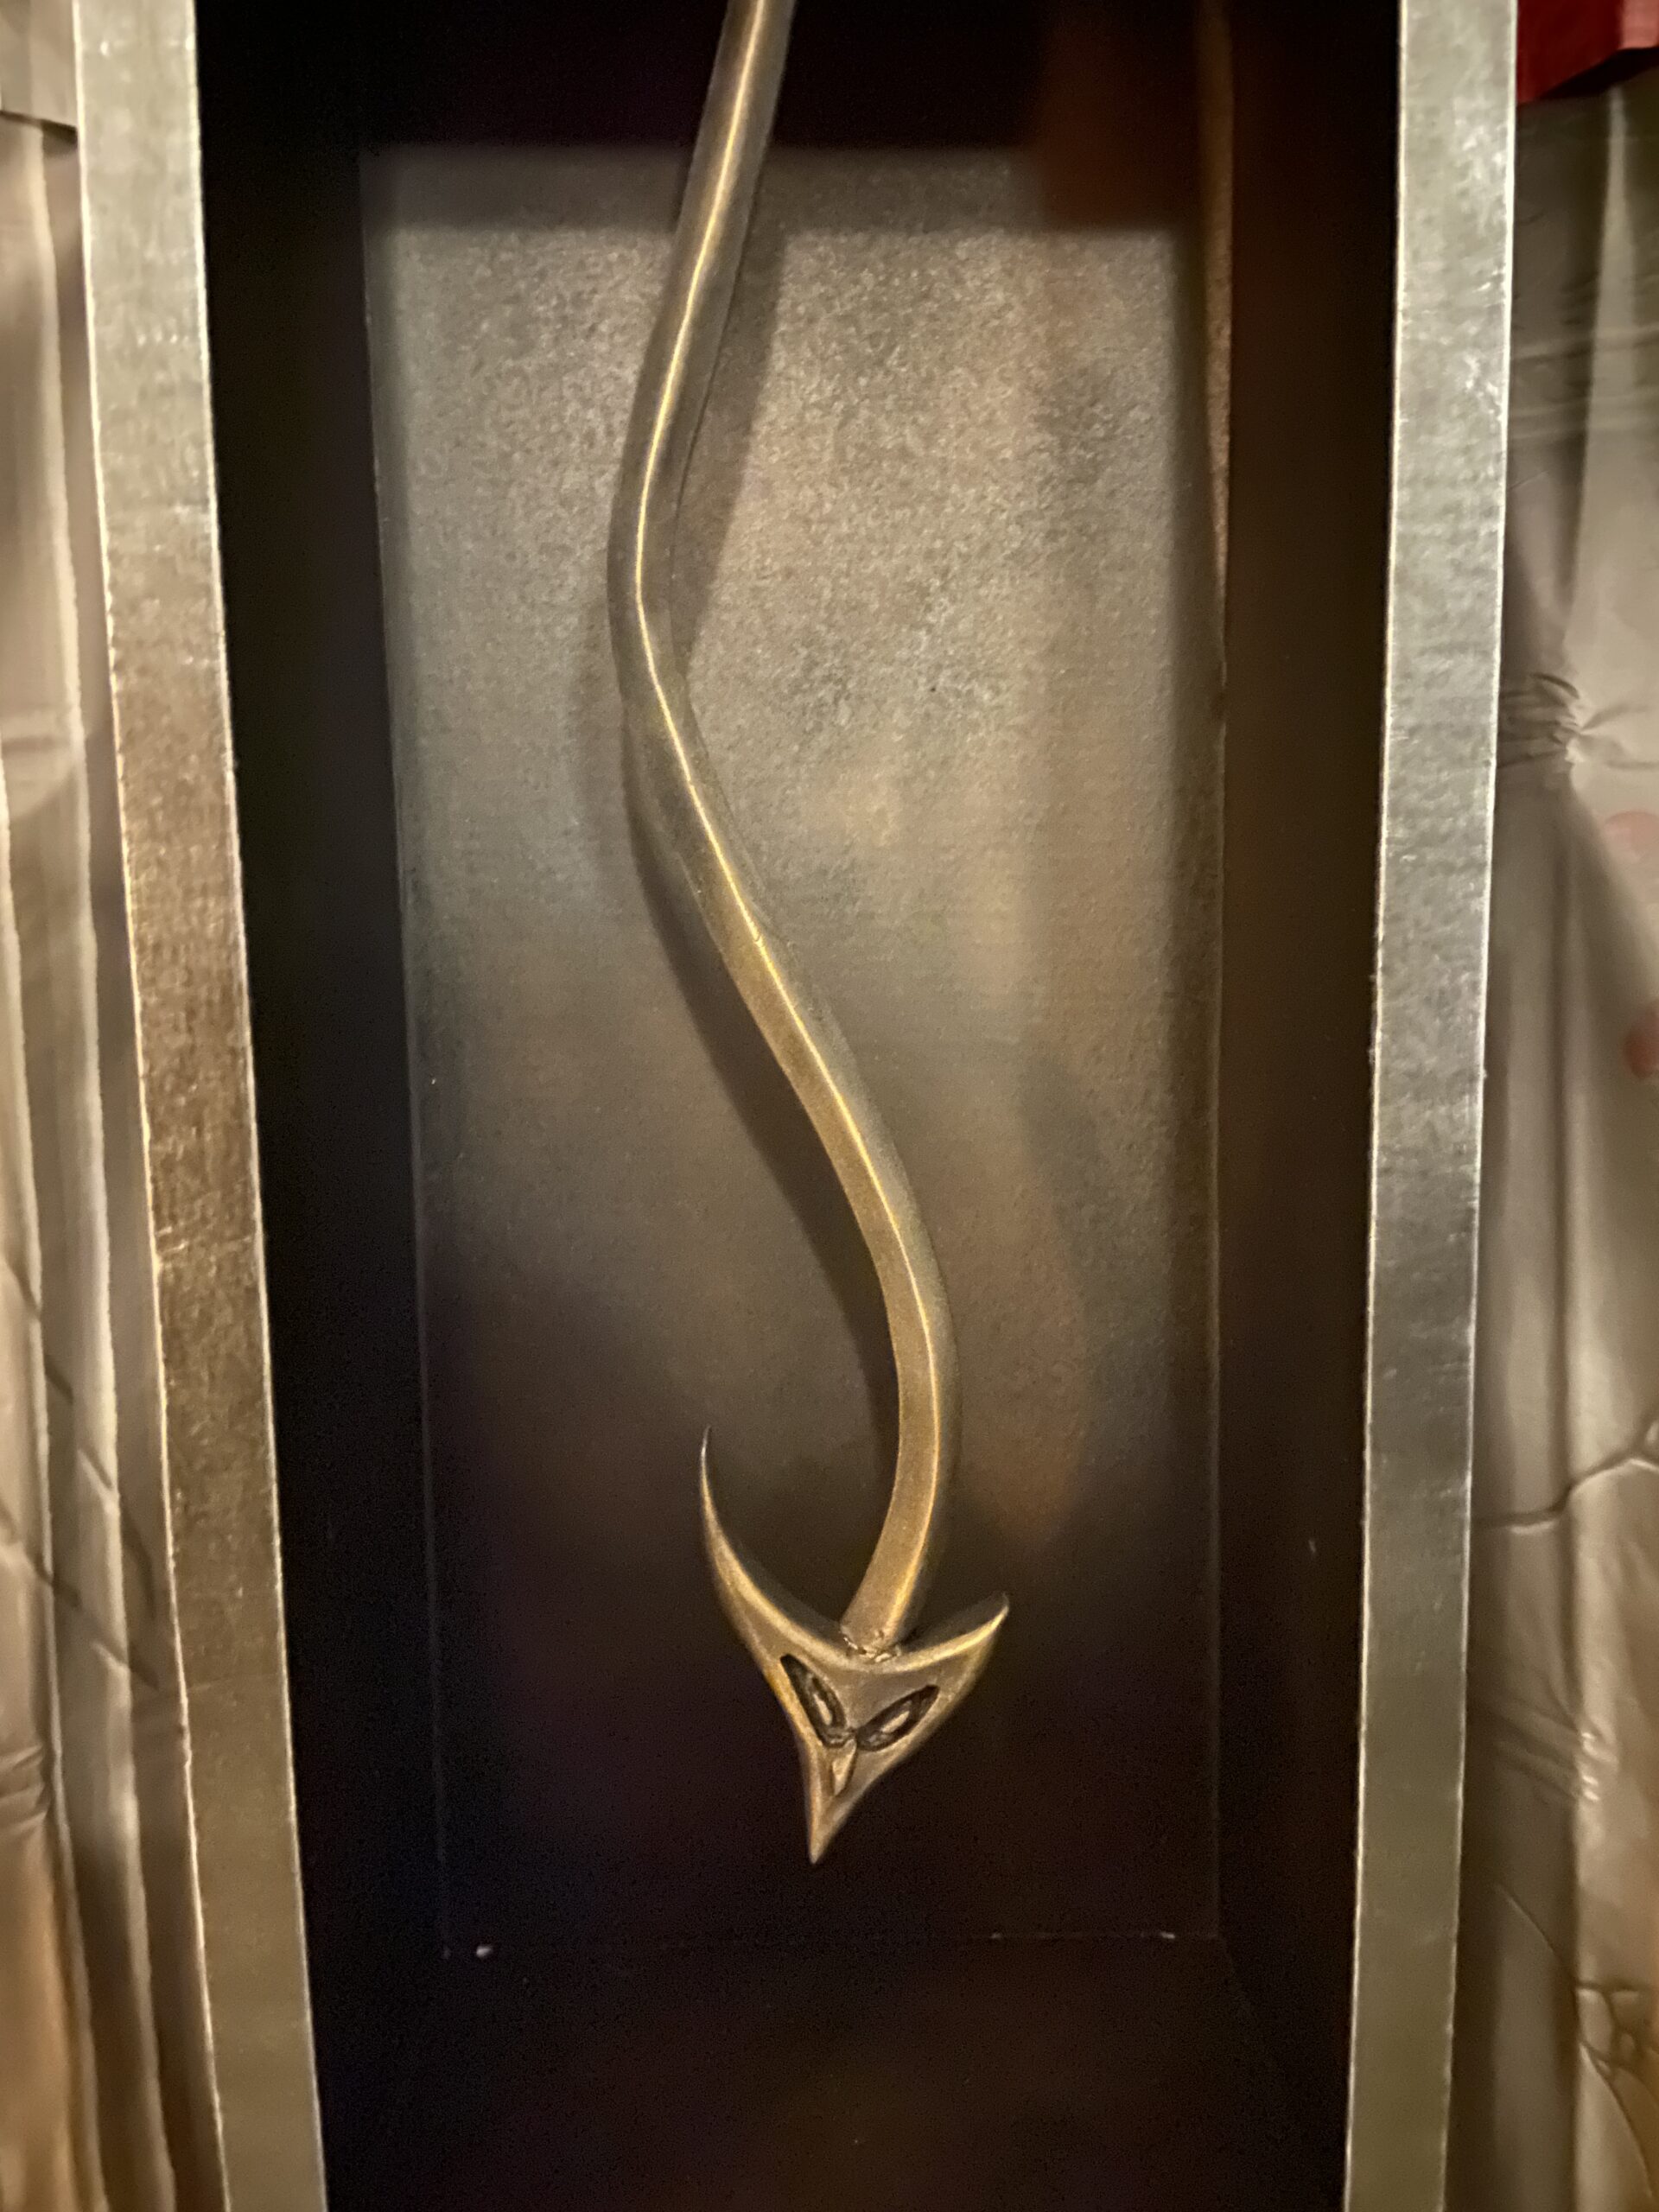
The hanging pendulum was also carved out of foam and was originally planned to be motorized for movement but due to time constraints was just hung on a hook to it can swing freely. It was painted black and then dry-brushed with a bronze acrylic. The rest of the clock was also painted black and then dry brushed with silver to highlight the edges.
The clock face can be downloaded from the DIY site then printed: http://diynmbcprops.blogspot.com/p/the-jackson-manorcom.html
Overall, we are very happy with the final product and it was a highlight of our Murder Mystery Dinner. I still plan to motorize the clock and pendulum at some point in the future.

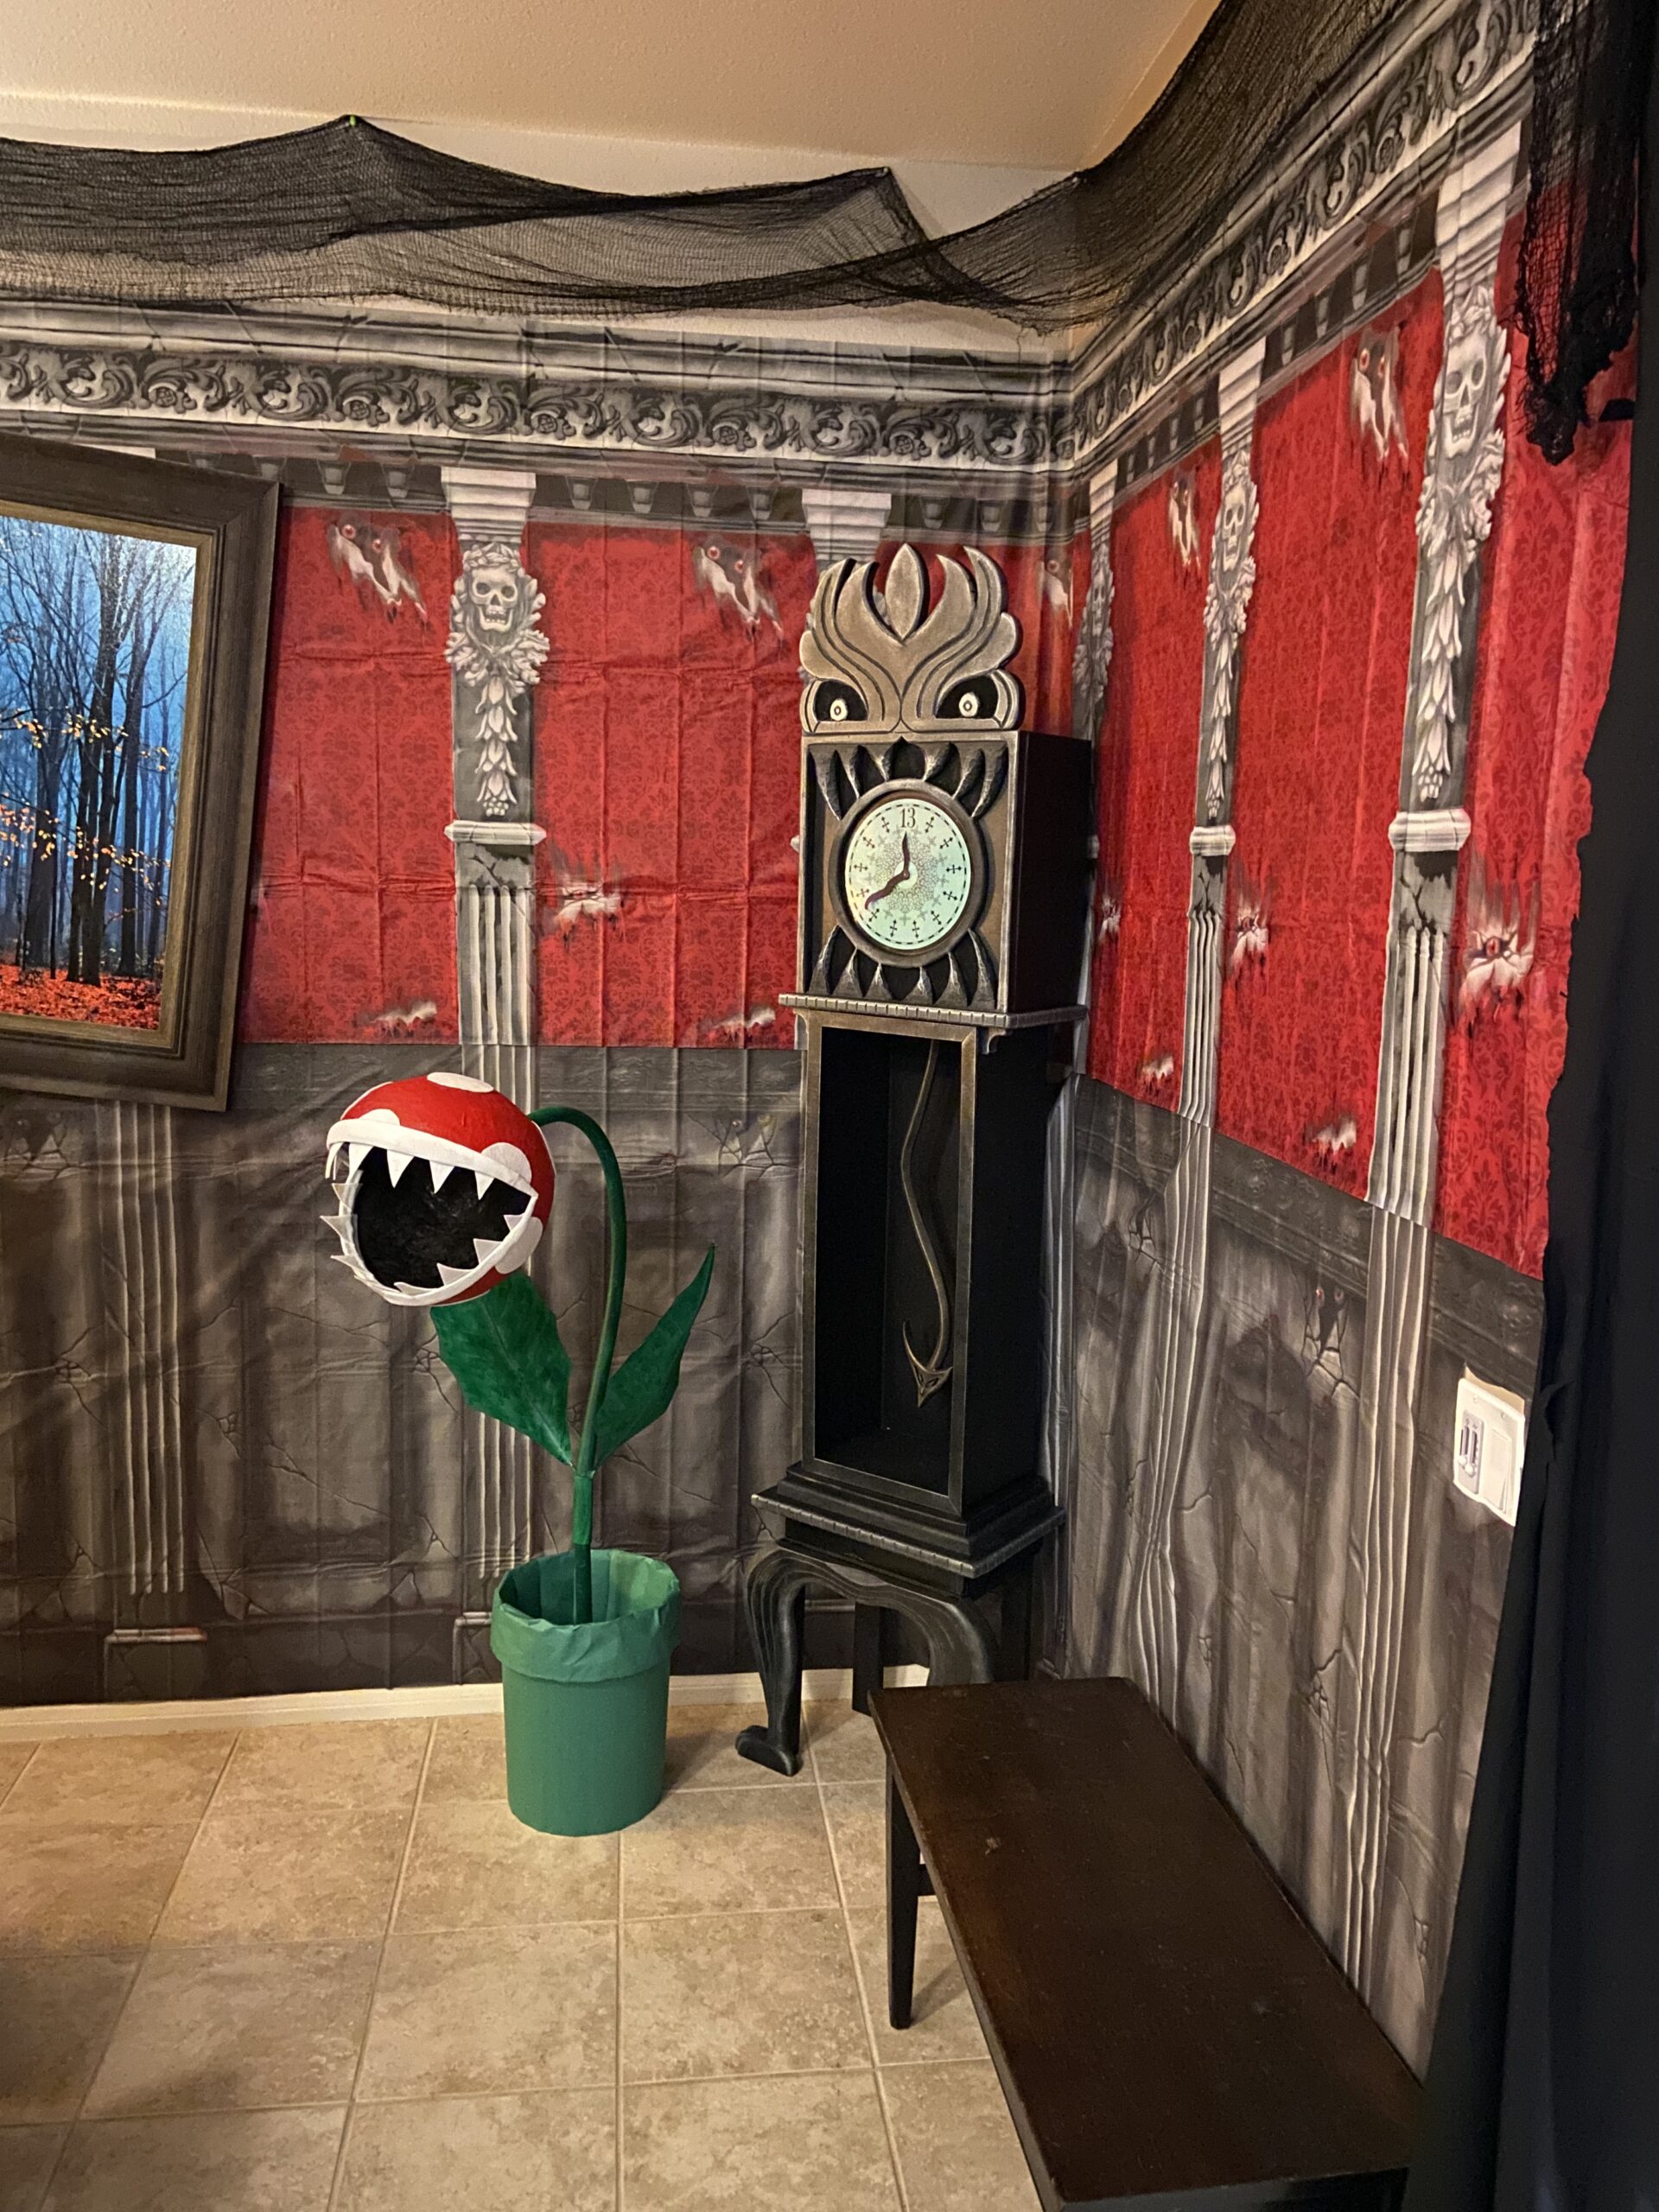
P.S. The Piranha Plants were created for a Trunk-or-Treat event. I plan to post about their construction on this site as well.
Your work is so amazing! I love this page soooo much! Thank you, you’re a genius.
Thank you! It was fun to design and build. We still use it every Halloween!